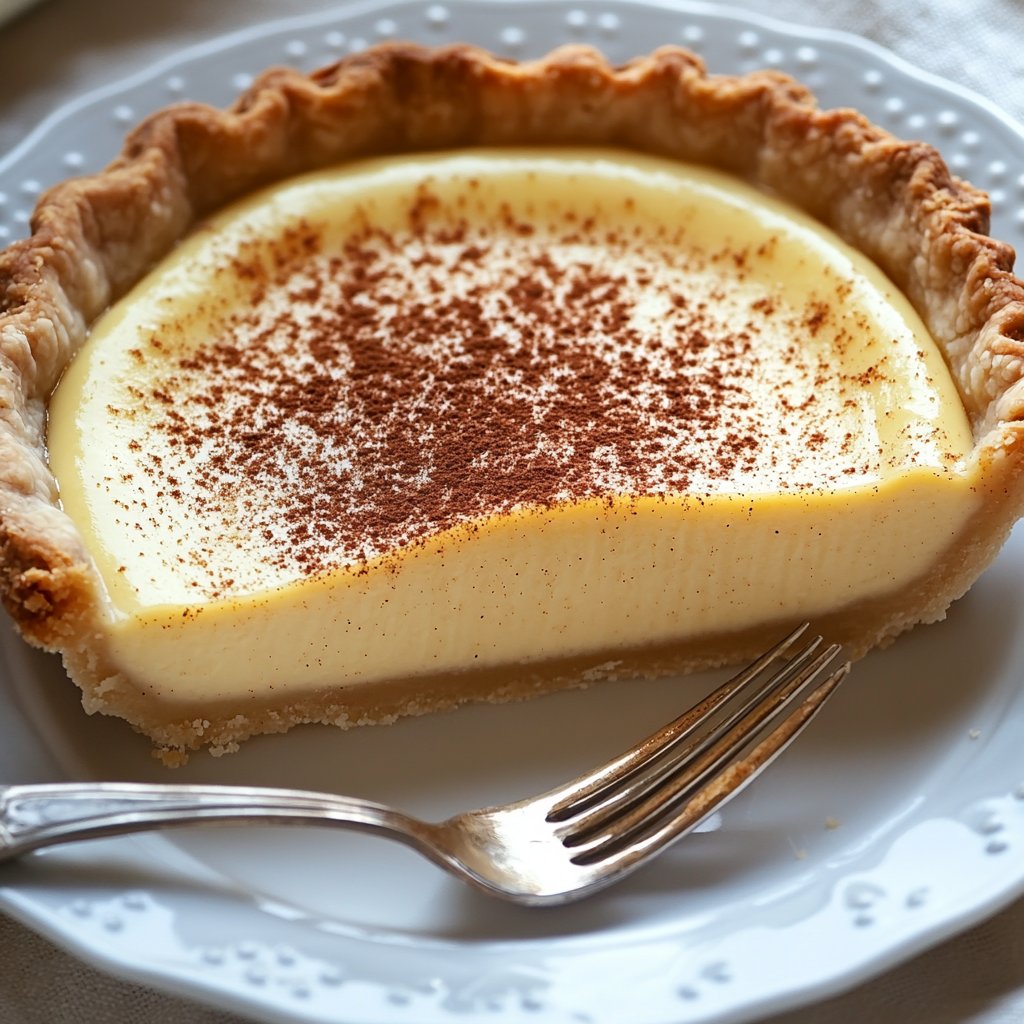
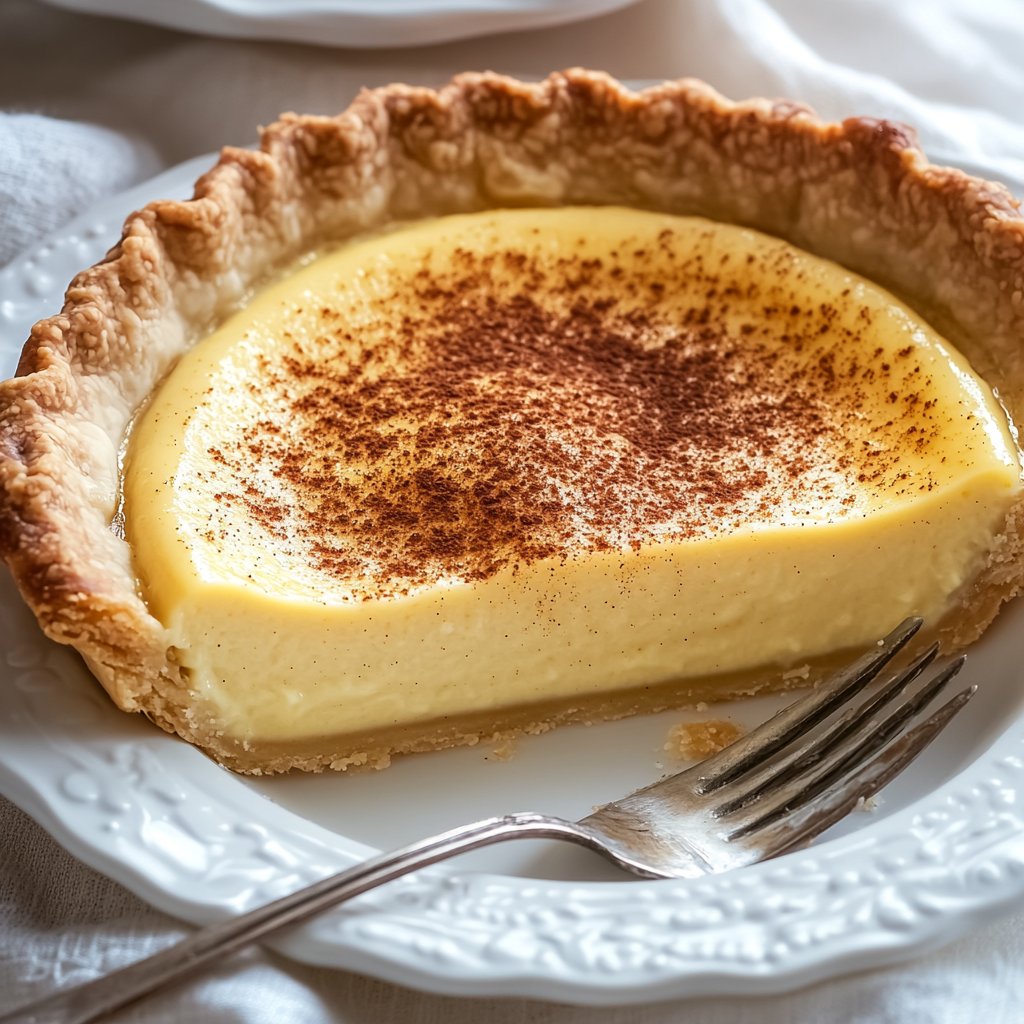
Vanilla Custard Pie
Okay, so hey there! Let’s chat about vanilla custard pie, yeah? This pie is like, my ultimate comfort food. Seriously. I remember being a kid, perched on a stool in my gran’s kitchen, just mesmerized by how she turned simple stuff like milk and eggs into this wobbly, glorious golden filling. She always said it was magic, and honestly, sometimes when I make it, I still feel a bit like I’m doing something magical myself!
It’s one of those recipes that feels really old school, in the best way. Like, no fancy ingredients, nothing complicated, just pure, unadulterated deliciousness. And the smell? Oh lord, the smell when it’s baking is just… *chef’s kiss*. It fills the whole house with this warm, vanillary hug. You’ve just gotta try it.
Why I Just Keep Making This Pie (And Why You Should Too!)
Honestly, this pie is my go to when I need something impressive but don’t have hours. It’s deceptively simple! I make this when I’m feeling a bit low and need a kitchen pick me up, or when friends are coming over last minute and I want something sweet and homemade. My family goes completely bonkers for this because it’s not too sweet, just creamy and smooth and packed with that lovely vanilla flavour (gotta get good vanilla!).
Plus, unlike some tricky pies, this one is pretty forgiving. Even if you slightly overbake it (oops, done that!), it’s still utterly scrumptious. It’s reliable, you know? A real workhorse of the dessert world.
Bits and Bobs You’ll Need (Ingredients!)
Right, let’s get down to the nitty gritty. Here’s what you’ll need:
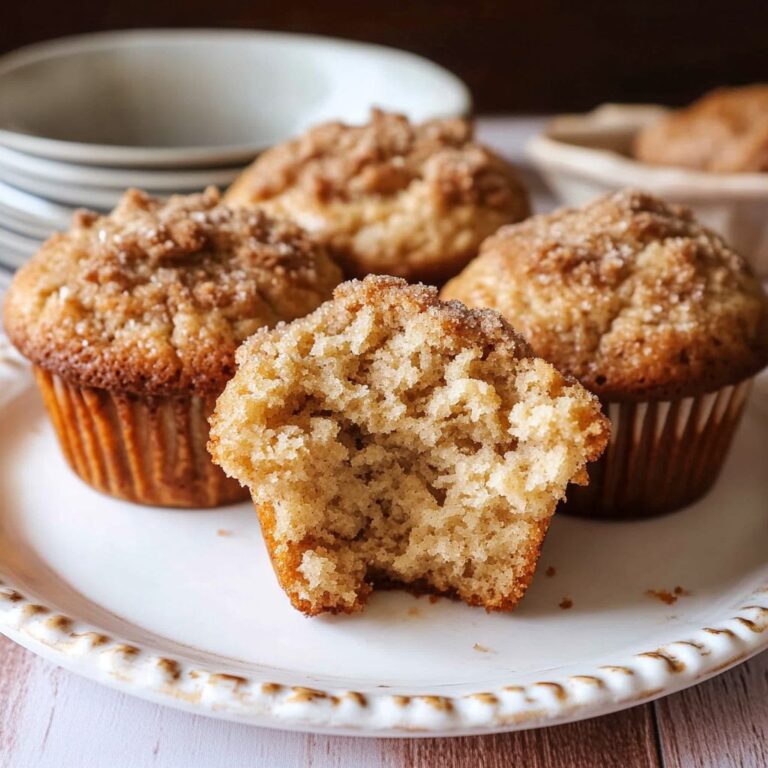
- 1 Unbaked 9 inch Pie Crust: You can totally use store bought, no shame in that game! My personal fave is usually something like Pillsbury’s ready made crust if I’m in a hurry, or you could use your go to homemade recipe. Make sure it’s properly chilled.
- 4 Large Eggs: Room temperature is best, but honestly? Don’t stress too much about it.
- 1/2 Cup Granulated Sugar: Just regular sugar, simple as that.
- 1/4 Teaspoon Salt: Just a little pinch to balance the sweetness.
- 2 and 1/2 Cups Whole Milk: I really think whole milk gives the best richness here. You *could* use 2% in a pinch, but the texture might not be quite as dreamy.
- 2 Teaspoons Pure Vanilla Extract: Okay, this is important. Use *good* vanilla! It makes all the difference. I’m partial to Nielsen Massey when I can splash out a bit, but whatever quality stuff you have will work.
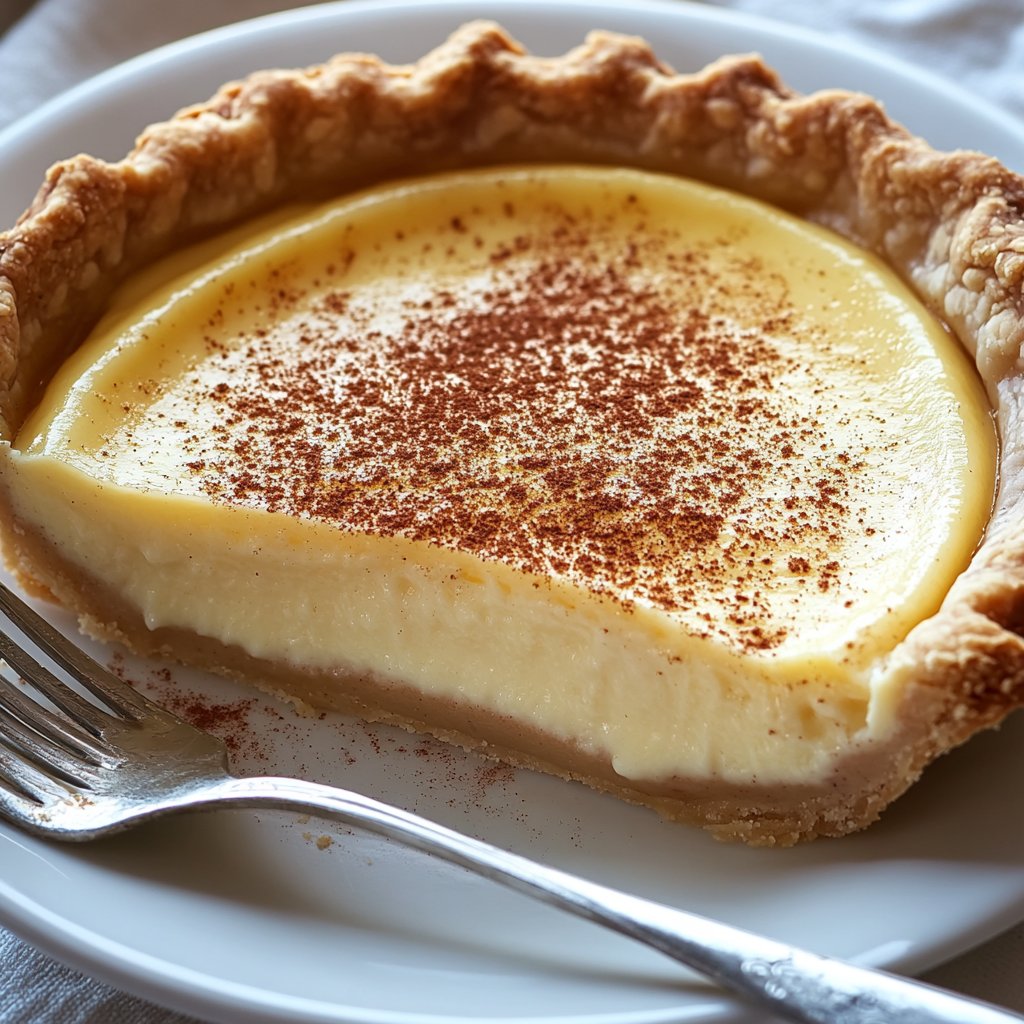
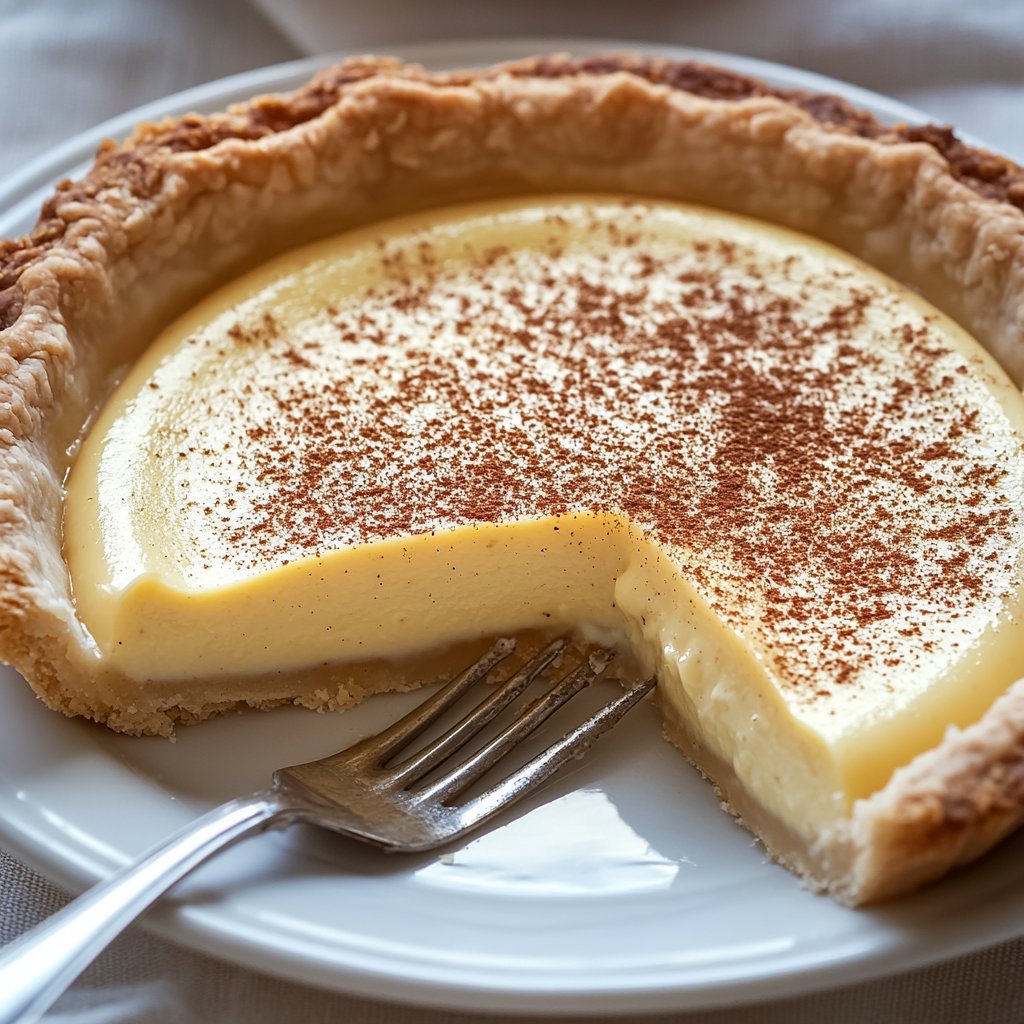
- A tiny grating of fresh Nutmeg (Optional but highly recommended!): Seriously, this is a game changer. Don’t skip it if you can help it.
Okay, Let’s Get This Pie Baked! (Directions)
Here’s how we do it. Don’t overthink it!
- First things first, get your oven preheating to 375°F (190°C). And while that’s happening, get your pie crust ready. If it’s frozen, let it thaw a bit form the freezer. If it’s fresh, just make sure it’s nestled in the pie plate and the edges are crimped nicely. Some people par bake their crust for custard pies; I don’t always bother, but it *can* help prevent a soggy bottom. On second thought, yeah, maybe par bake it for about 10 15 minutes? It’s worth the extra step.
- In a medium bowl, whisk together the eggs, sugar, and salt until they’re all blended and a little frothy. You want to make sure the sugar isn’t just sitting at the bottom.
- In a saucepan, gently heat the milk over medium heat. You don’t want it to boil! Just get it warm, steaming slightly around the edges. This is where I usually sneak a taste of the warm milk, it’s lovely!
- Now, this is the part people worry about tempering the eggs. It just means slowly adding the hot milk to the egg mixture so you don’t scramble the eggs. Pour the warm milk into the egg mixture *very slowly* while whisking constantly. Like, a thin stream. Keep whisking, whisking, whisking. It will look a bit like milky scrambled eggs if you go too fast, don’t do that! But don’t worry if a tiny bit scrambles, you can strain it out later.
- Once all the milk is incorporated, stir in the vanilla extract. Now, remember that nutmeg? Grate a little bit right into the mix. Oh boy.
- If you’re worried about any little cooked bits form the tempering, you can pour the mixture through a fine mesh sieve right into your prepared pie crust. I usually do this just to be safe; it makes the filling extra smooth.
- Carefully place the pie on a baking sheet (makes it easier to get in and out of the oven and catches any spills, just in case).
- Bake for about 30 40 minutes. How do you know it’s done? The edges should be set, maybe even slightly puffy, but the center (about 1 inch from the edge) should still be a little wobbly. It will finish setting as it cools. Don’t overbake it or you’ll get a rubbery texture instead of that perfect jiggle!
- Take it out of the oven and let it cool *completely* on a wire rack. This is the hardest part, I know! It needs time to set up properly. Don’t even think about slicing into it hot, you’ll have a runny mess. It usually takes a couple of hours.
- Chill it in the fridge for at least 2 3 hours, preferably longer. I honestly think it tastes better the next day once all the flavors have melded.
Things I’ve Learned (Notes from the Kitchen!)
So, over the years of making this, I’ve picked up a few things:
- Sometimes, if I’m using a really thin crust, I’ll put a pie crust shield or foil around the edges for the first half of the baking time to stop them getting too dark before the center is done.
- If your milk is *too* hot when you temper, you’ll definitely scramble the eggs. Low and slow on the milk heating is key. And pour *really* slowly when combining!
- Don’t skip the chilling step! Seriously, it makes the world of difference to the texture. Patience is a virtue, as they say, especially with custard pie.
Trying New Things (Variations!)
Most of the time I just stick to the classic, because it’s perfect as is, but I have fiddled a bit:
- Lemon Custard: I tried adding some lemon zest and a splash of lemon juice once. It was actually really nice! A bit brighter, lovely for summer.
- Coconut Custard: Swapped some of the milk for coconut milk and added a bit of shredded coconut. Mmm, tropical vibes!
- Chocolate Chips: Okay, this one was a fail. I thought adding chocolate chips would be fun, but they just sunk to the bottom and got hard and burnt. Stick to vanilla for this one, folks.
Kitchen Gear You Might Need
You don’t need loads of fancy stuff for this. A pie plate, a saucepan, a whisk, and a couple of bowls are pretty much it. A fine mesh sieve is handy for straining, but if you temper *really* carefully, you might get away without it. And a baking sheet is a good shout for getting it in and out of the oven safely.
Keeping it Fresh (Storage)
This pie needs to be stored in the fridge because of the dairy and eggs. Cover it loosely with plastic wrap or foil once it’s completely cool. It’ll keep for 3 4 days, though honestly, in my house it never lasts more than a day or two if I’m lucky!
How I Like to Eat It (Serving Suggestions)
Cold, right out of the fridge is my absolute favourite way. A slice with a cup of tea? Perfection. Sometimes I’ll put a little dollop of whipped cream on top, especially if I’m feeling fancy, but it’s totally unnecessary. It’s just gorgeous on its own.
Lessons Learned (Pro Tips From My Mistakes)
- Don’t Overbake: I know I said it already, but seriously. The difference between perfectly set and rubbery is small. Look for the slight wobble in the center. I once tried rushing this step by turning the heat up and regretted it because the edges were burnt and the middle was still liquid.
- Chill Time is Non Negotiable: Trying to serve it warm or only slightly cool results in a sad, sloppy mess. Let it chill!
- Quality Vanilla: Again, spend a little extra on decent vanilla extract. It’s the main flavour here, so don’t skimp. You can even scrape the seeds form half a vanilla bean into the milk as it heats, if you’re feeling extra! Strain it out before tempering.
FAQs (Stuff People Ask Me)
- Can I use a different size pie dish?
- Hmm, maybe? A slightly smaller or larger one would probably be okay, but you might need to adjust the baking time. Keep a closer eye on it!
- My custard looks lumpy, what did I do wrong?
- Ah, yeah, that probably happened during the tempering step. You poured the hot milk too fast into the eggs, or maybe the milk was too hot. Don’t worry! Just strain it through a fine sieve before pouring it into the pie crust. It should still turn out smooth!
- Can I make this ahead of time?
- Absolutely! It actually *needs* to be made ahead so it has time to chill and set properly. Making it the day before is ideal!
- Is this like Crème brûlée filling?
- Similar ingredients, but no! Crème brûlée usually uses cream not milk, and has a richer texture, and then you burn sugar on top. This is more traditional, old fashioned pie custard!
- Why did my crust shrink?
- Could be a few things if it’s homemade maybe you overworked the dough, or didn’t chill it enough. Using a good quality store bought crust usually avoids this issue if you’re struggling with pastry.
Anyway, hope you give this a go! Let me know if you do, I’d love to hear about it. Happy baking!