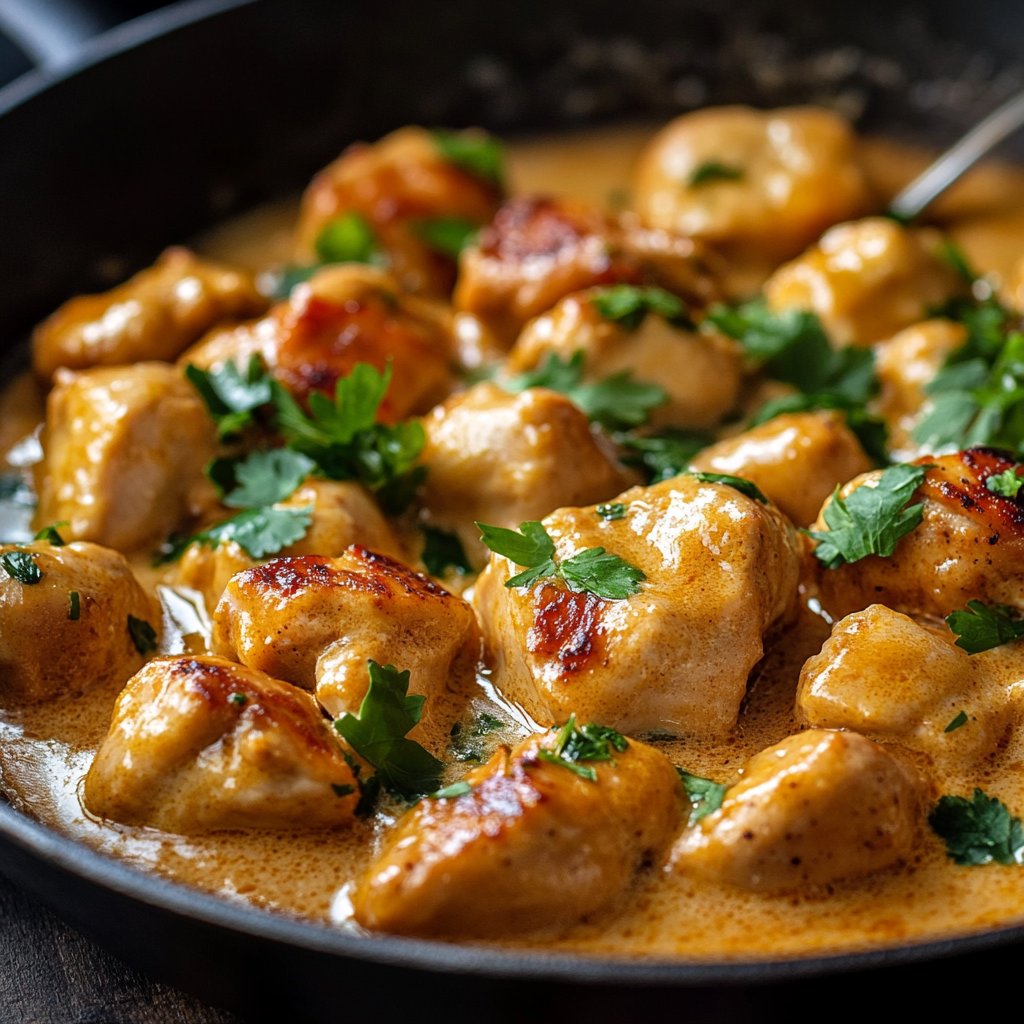
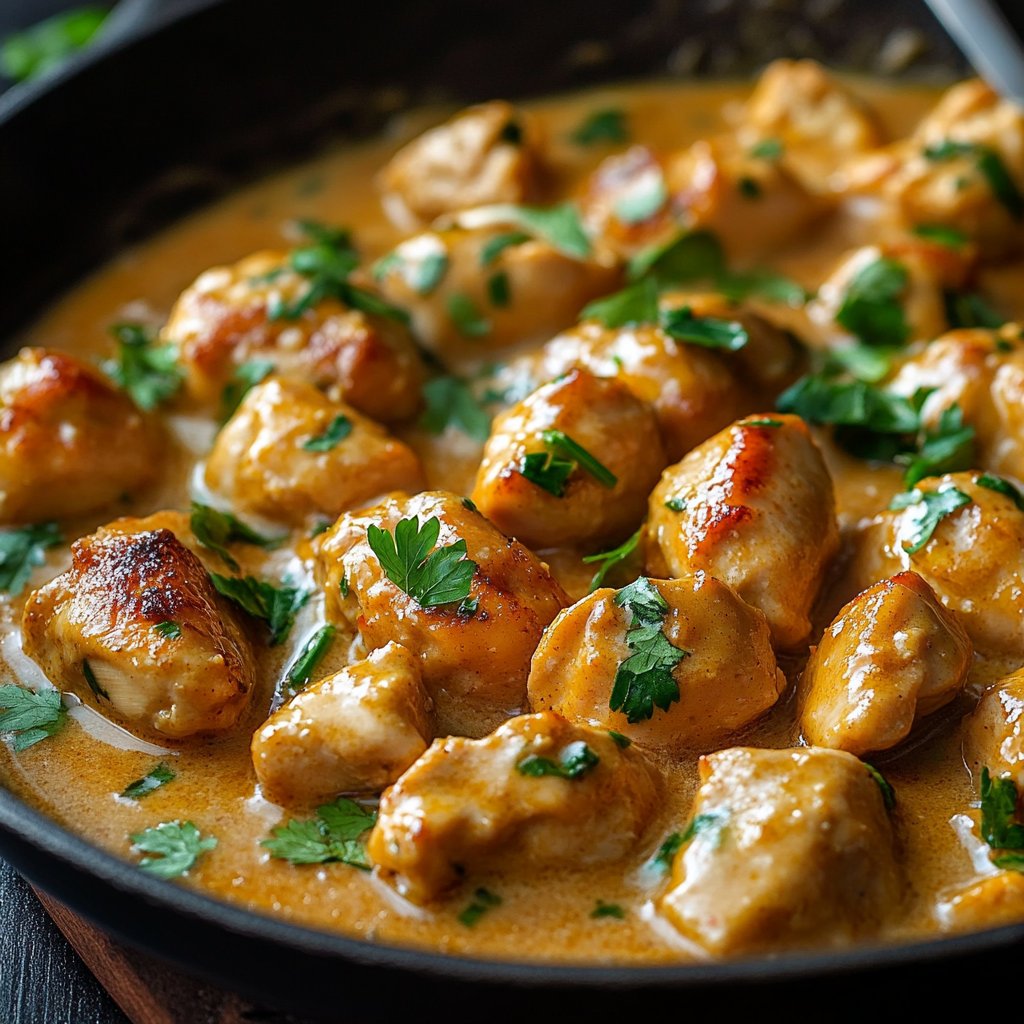
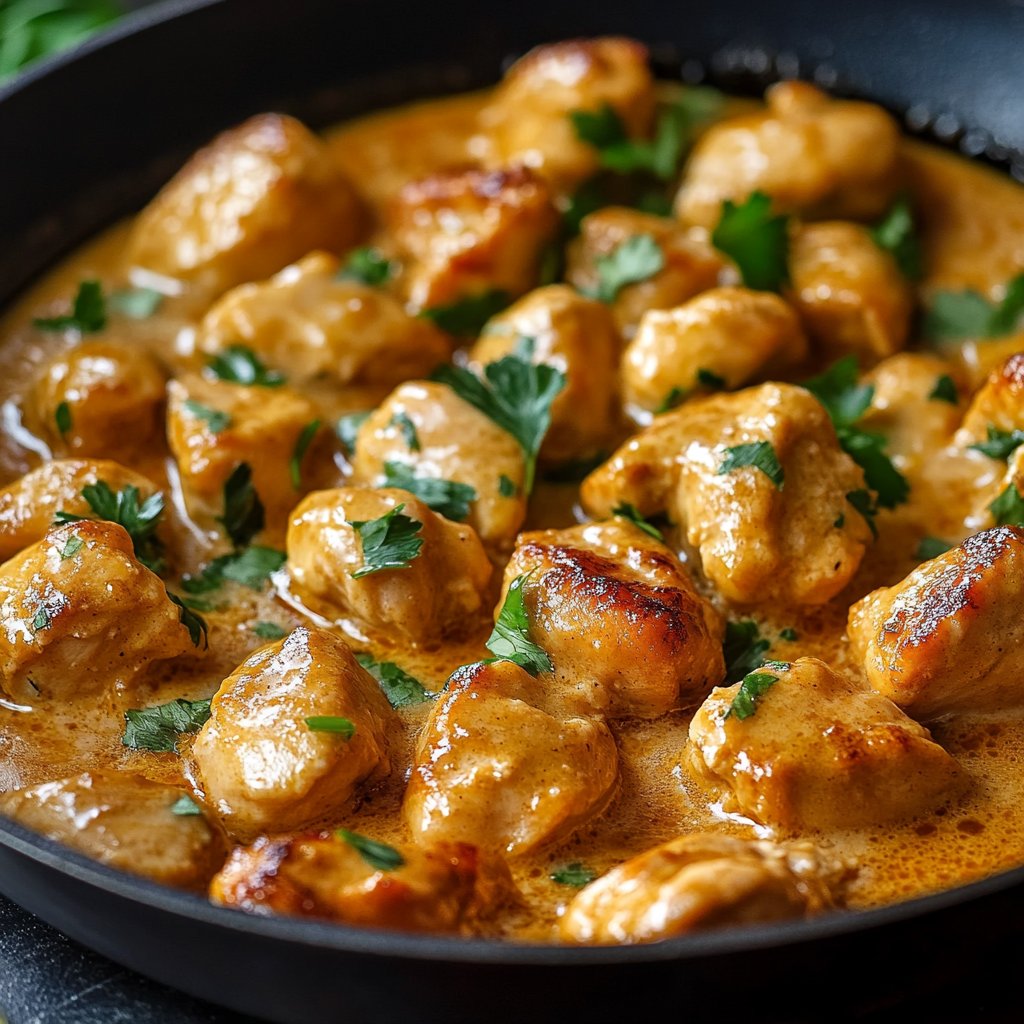
Texas Roadhouse Butter Chicken Skillet Bliss
Okay, so listen up. You know that feeling when you’re absolutely *fixin’ to* devour that creamy, dreamy butter chicken from Texas Roadhouse, but you just don’t wanna, like, put on real pants and go out? Yeah, me too. Happens way more often than I care to admit. And honestly, sometimes I just crave it on a Tuesday night without the whole production. Plus, let’s be real, those rolls they serve with it are legendary, but making a whole trip just for the chicken felt… inefficient? Anyway, that craving led me down a rabbit hole of trying to recreate something similar at home, and after a *lot* of testing (and trust me, there were some questionable batches), I finally landed on this skillet version that hits all the right notes. It’s not an *exact* copycat, obviously, because restaurant magic is a whole other level, but it gets you darn close to that comforting, buttery, chicken-y goodness. This is my current kitchen obsession, you guys.
Why This Dish Rocks My World
Oh man, why *wouldn’t* you love this? I make this when I need a serious comfort food hug but don’t have hours to spend simmering things. My family goes absolutely bonkers for this because it’s rich, flavorful, and honestly, just plain satisfying. It’s the kind of meal that makes everyone happy and usually gets requests for seconds. (Which is great, but also means leftovers are a rarity!). It’s also surprisingly quick for how much flavor it packs in. And look, I used to think making creamy skillet sauces was intimidating, but turns out? It’s totally doable! This recipe helped me get over that little hurdle.
What You’ll Need
- About 1.5 lbs Boneless, Skinless Chicken Breasts or Thighs: I tend to use breasts ’cause that’s what I usually have, but thighs would be amazing and probably stay even juicier. Cut ’em into bite-sized pieces, ya know? Like maybe inch-ish cubes?
- 2 Tablespoons Butter: Real butter, please! No substitutes here, it’s *butter* chicken!
- 1 Tablespoon Olive Oil: Just a little to help things brown nicely.
- 1 Medium Onion: Chopped. Doesn’t have to be perfect dice, just… chopped.
- 2-3 cloves Garlic: Minced. Use more if you’re a garlic fiend like me!
- 1.5 teaspoons Garam Masala: This spice blend is key! If you don’t have it, you can make a quick substitute with cumin, coriander, cardamom, black pepper, cinnamon, and maybe a pinch of cloves, but honestly, just get the garam masala if you can.
- 1 teaspoon Ground Cumin: Gives it that earthy depth.
- 1 teaspoon Paprika: For color and a little sweetness. Smoked paprika works too!
- 1/2 teaspoon Ground Turmeric: Mostly for that gorgeous yellow color, but it’s good for ya too!
- 1/4 teaspoon Cayenne Pepper (or more!): For a little kick. Adjust to your heat preference. My kids are wimps, so I go light.
- 1 (15 oz) Can Tomato Sauce: Just plain tomato sauce, not crushed tomatoes or paste.
- 1/2 cup Chicken Broth: Or water if you’re in a pinch, but broth adds more flavor.
- 1/2 cup Heavy Cream: This is where the magic happens!
- 1 teaspoon Sugar: Helps balance the acidity of the tomatoes.
- Salt and Freshly Ground Black Pepper: To taste, obviously.
- Fresh Cilantro: For garnish, totally optional but adds a lovely freshness. My husband hates it though, so I usually just put it on mine.
- Optional: A splash of lemon juice or a little plain yogurt at the end for extra tang. I sometimes use a dollop of sour cream if I’m outta yogurt.
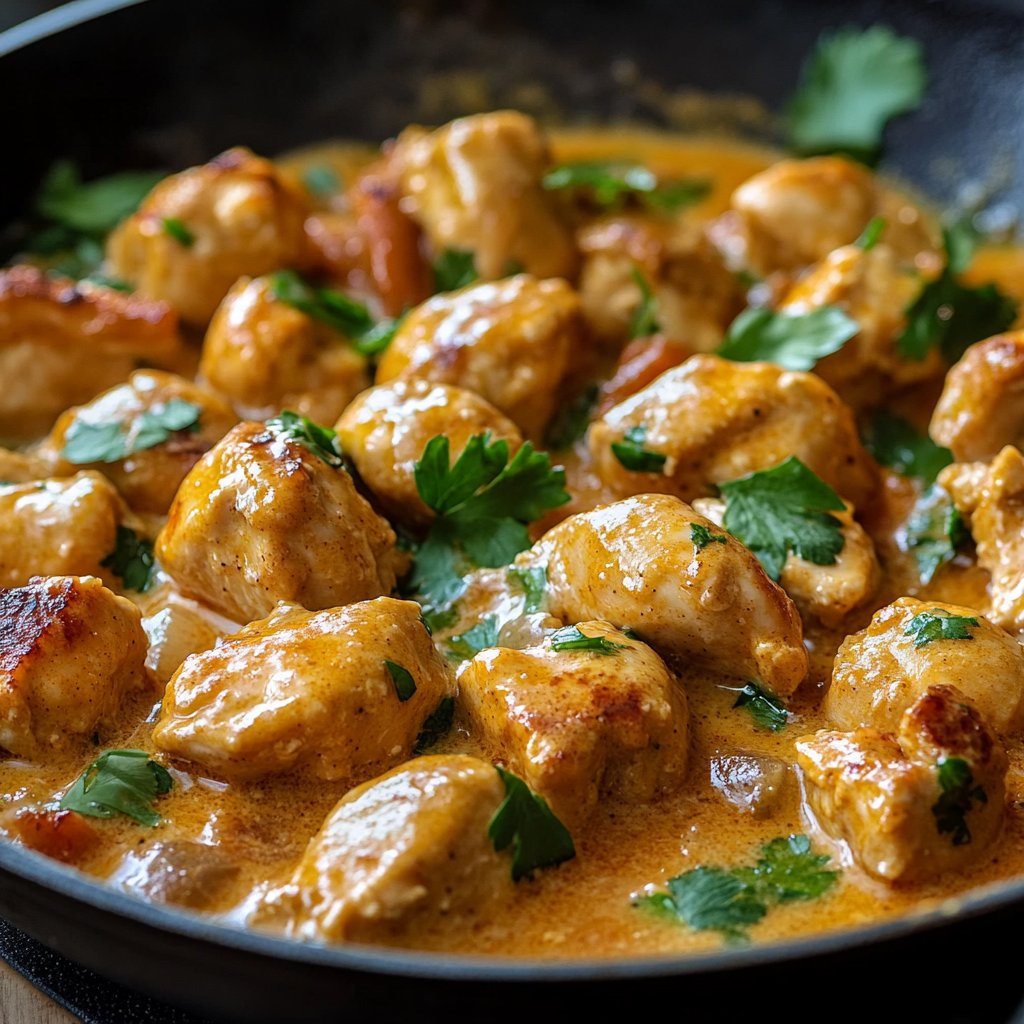
How to Make This Magic Happen
- Get the Chicken Ready: Cut your chicken into pieces. Pat it dry with paper towels – this helps it brown better! Season generously with salt and pepper.
- Sizzle Time: Heat the butter and olive oil in a large skillet (cast iron is my fave here!) over medium-high heat. When the butter’s melted and maybe just starting to look foamy, add the chicken in a single layer. Don’t overcrowd the pan! You’ll probably have to do this in batches. Brown the chicken on all sides until it’s nice and golden. It doesn’t need to be cooked through yet, just get that lovely color. Remove the chicken from the skillet and set it aside.
- Onion & Garlic Party: Lower the heat to medium. Add the chopped onion to the skillet. Cook, stirring occasionally, until it’s softened and looks translucent, about 5-7 minutes. If the pan seems dry, add just a tiny splash more oil or butter. Push the onions to the side a bit and add the minced garlic. Cook for just about 30 seconds until fragrant – don’t let it burn!
- Spice It Up: Add the garam masala, cumin, paprika, turmeric, and cayenne pepper to the skillet with the onions and garlic. Stir it all around and cook for about a minute, letting those spices toast and become super fragrant. Your kitchen is fixin’ to smell amazing right about now!
- Sauce Base: Pour in the tomato sauce and chicken broth. Stir everything together, scraping up any browned bits form the bottom of the skillet (that’s flavor!). Add the sugar. Bring the sauce to a simmer.
- Bring the Chicken Back: Return the browned chicken pieces to the skillet. Stir to coat the chicken in the sauce. Reduce the heat to low, cover the skillet, and let it simmer gently for about 15-20 minutes, or until the chicken is cooked through and tender. Give it a stir every now and then.
- Creamy Finish: Uncover the skillet. Pour in the heavy cream. Stir it in gently. Let it simmer, uncovered, for another 5-10 minutes, or until the sauce has thickened slightly to your liking. This is where I usually sneak a little taste and adjust the salt and pepper if needed. Add that optional splash of lemon juice or swirl of yogurt here if you want extra brightness.
- Serve It Up: Remove from the heat. Garnish with fresh cilantro if you’re using it. Serve hot!
A Few Things I’ve Learned
- Patting the chicken dry is a small step but it makes a *big* difference in getting a nice sear. Trust me on this one.
- Don’t rush the spice toasting step! That minute really wakes up the flavors and gets them ready to mingle with the sauce.
- I found that letting it simmer covered helps the chicken stay moist, but simmering uncovered at the end thickens the sauce perfectly. It’s a two-stage simmer process.
- Adding the cream too early can sometimes make the sauce… weird? Always add it at the end after the chicken is fully cooked.
- Honestly, I think this tastes even better the next day after the flavors have had more time to hang out.
Playing Around With It
I’ve tinkered a bit, you know? Tried adding frozen peas once, and nope, didn’t work for me, they just tasted kinda sad and out of place. But adding some finely chopped bell pepper along with the onion? That was pretty good! You could also probably swap the chicken for paneer (an Indian cheese) if you wanted a vegetarian version, I haven’t personally done it with *this* recipe but it seems like it would work. Or maybe chickpeas? Hmm, worth an experiment!
Tools of the Trade
You really just need a good, large skillet for this. A 10 or 12-inch cast iron skillet is truly the holy grail for dishes like this because it heats evenly and can handle the heat. But honestly, any large, heavy-bottomed pan that can go from stovetop to maybe even the oven (though we don’t need the oven for *this*) will work. If you don’t have a lid for your skillet, just use a baking sheet or another large plate to cover it during the simmering stage.
- Large Skillet (like this Lodge one, totally love mine!)
- Cutting Board
- Sharp Knife
- Measuring Spoons and Cups
- Wooden Spoon or Spatula
Keeping It Fresh
Let it cool completely, then pop it in an airtight container in the fridge. It’ll keep for maybe 3-4 days, though honestly, in my house it never lasts more than a day!
How I Like to Serve It
My absolute fave is with plain white rice, because it soaks up all that glorious sauce. But it’s also amazing with naan or flatbread for dipping. And you know what else? A simple side salad with a light vinaigrette is nice to cut through the richness. Sometimes, if I’m feeling extra, I’ll make some quick roasted veggies to go alongside.
Oops! Learn form My Mistakes
Don’t overcrowd the pan when browning the chicken! I once tried rushing this step and threw all the chicken in at once, and it just steamed instead of browning. You lose a lot of flavor that way. Brown in batches, even if it takes an extra few minutes, it’s totally worth it. Also, don’t blast the heat when adding the cream; keep it low and stir gently to incorporate.
Got Questions?
Q: Can I use frozen chicken?
A: Yeah, you can, just make sure it’s fully thawed before you cut and cook it. Patting it super dry is even more important with thawed form frozen chicken!
Q: Is this really like Texas Roadhouse?
A: Okay, look, it’s *inspired* by that craveable flavor profile – creamy, buttery, savory chicken. Is it an identical clone? Probably not, those restaurant kitchens have their secrets, right? But it hits that same comfort spot, big time. Think of its like a really good cover band doing your favorite song!
Q: Can I make this ahead of time?
A: Absolutely! As I said above, I think it’s actually better the next day. Just cool it completely and store it. Gently reheat on the stovetop or in the microwave. You might need to add a tiny splash of water or broth if the sauce seems too thick after chilling.
Q: What if I don’t have heavy cream?
A: You could try using half-and-half, but the sauce won’t be quite as rich and thick. Milk is too thin, I wouldn’t recommend that. Coconut milk (full fat) *could* work for a dairy-free version, but it will definitely change the flavor profile to be more Indian-inspired than the Texas Roadhouse vibe. Worth a try if you’re experimenting though! You can search for other substitutes too, but cream is best here.