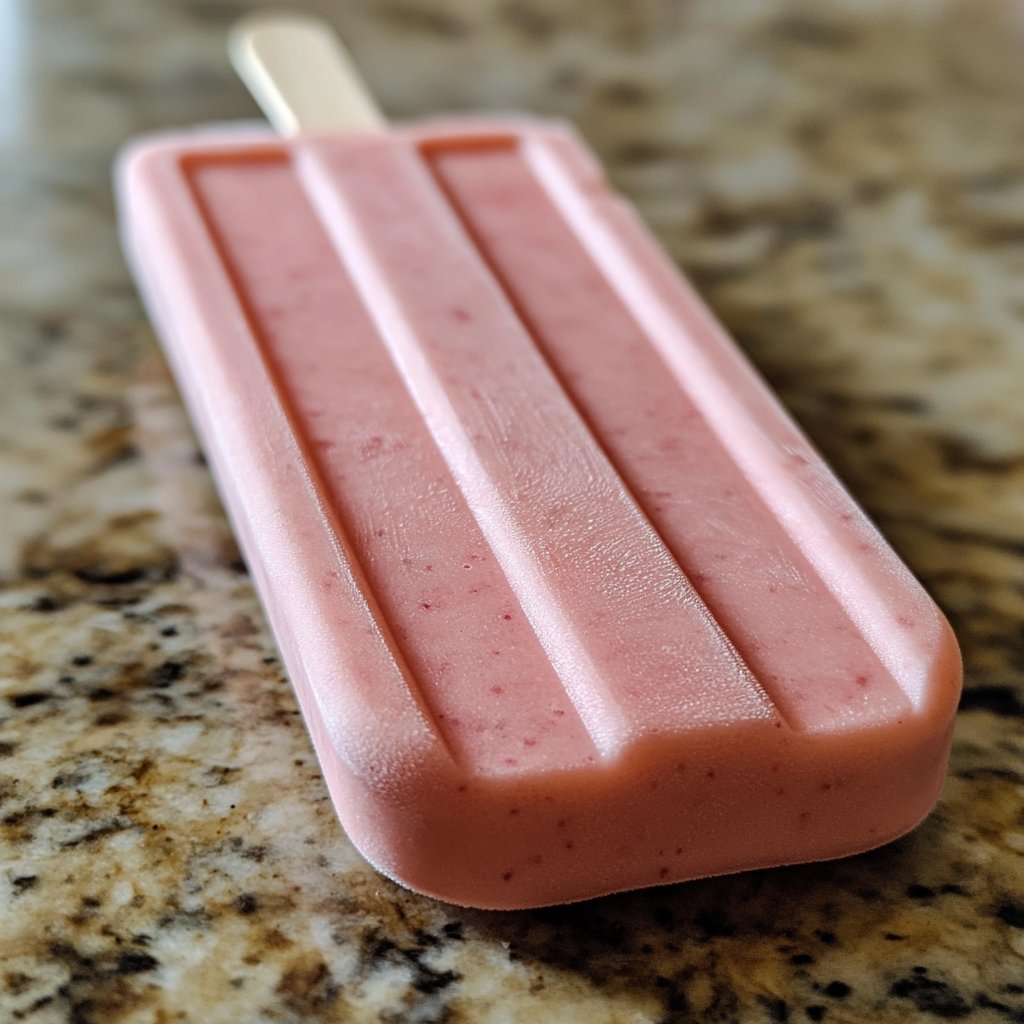
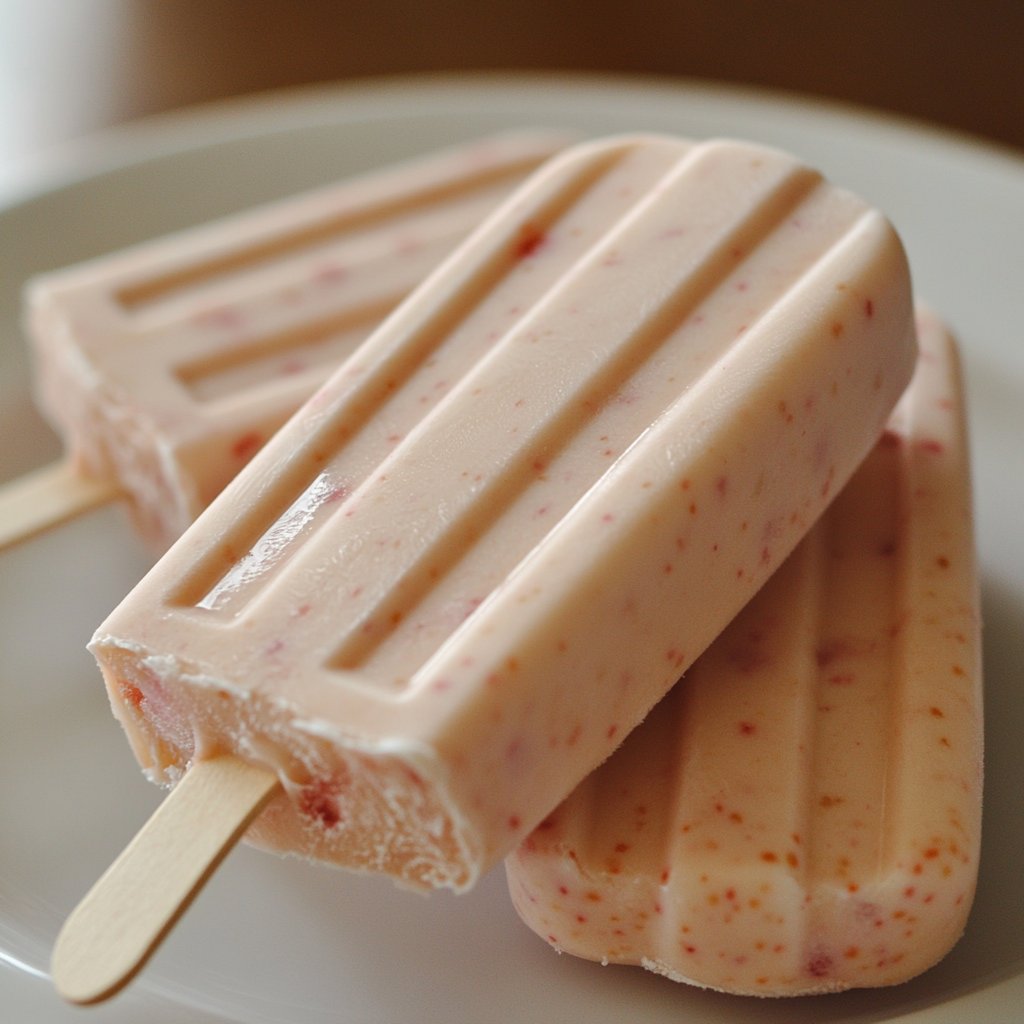
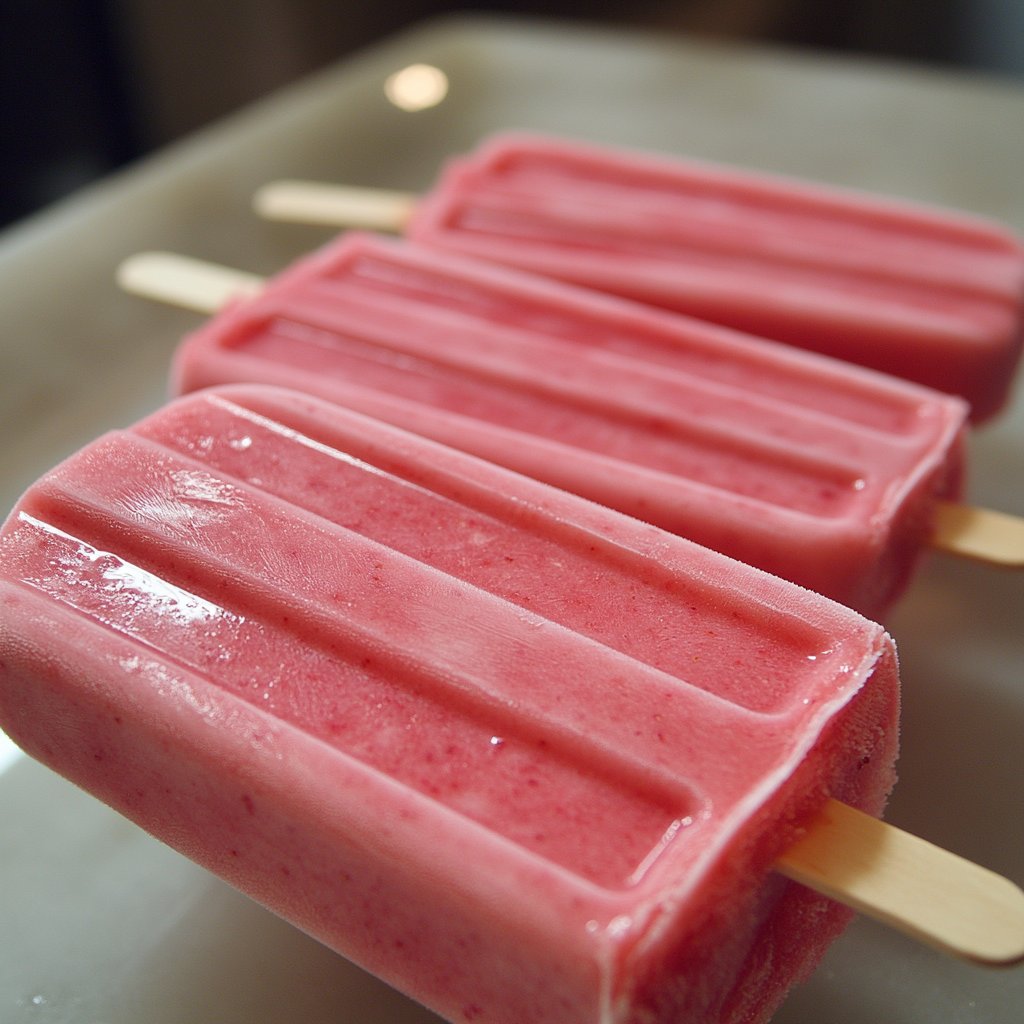
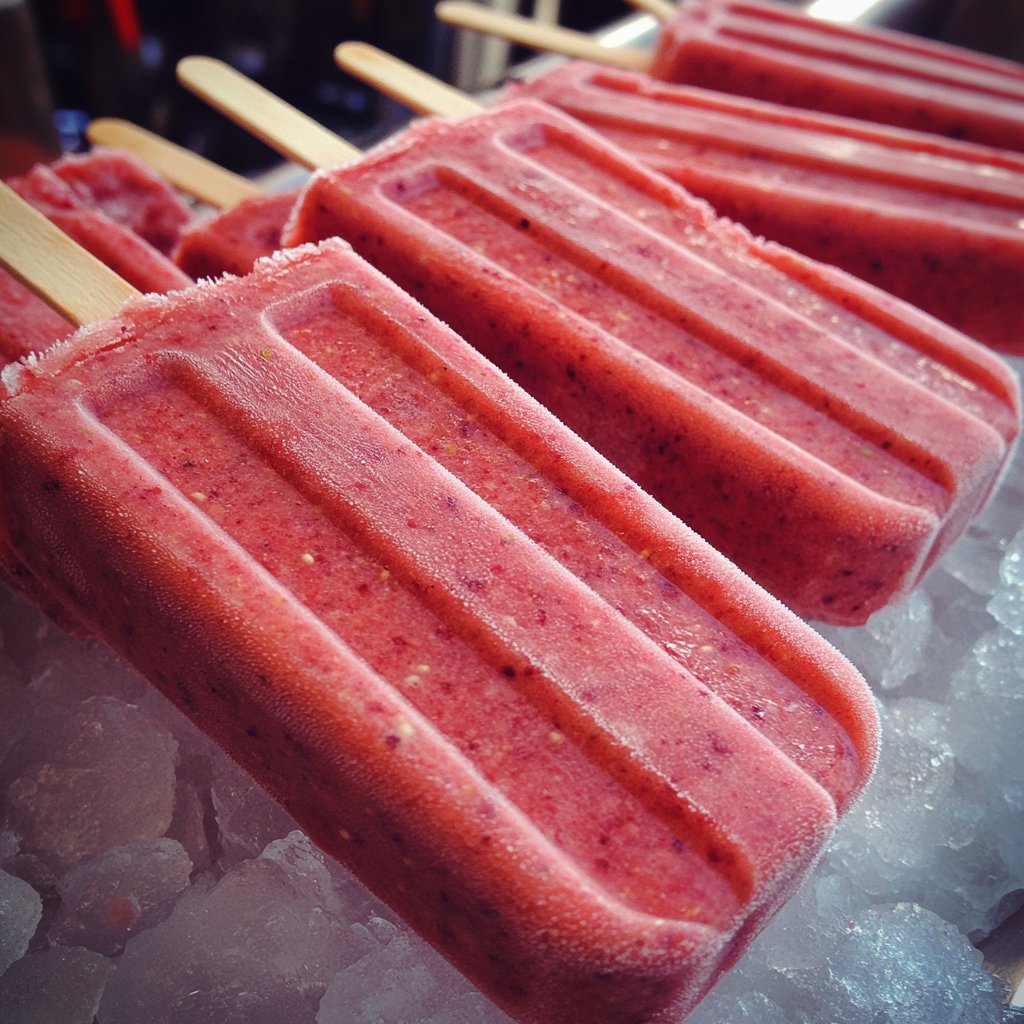
Delicious, irresistible picture of Strawberry Yogurt Popsicles
Hey Y’all! Let’s Make Some Popsicles
Okay, so listen. I was just thinking the other day about those perfect summer afternoons, you know? The ones where it’s hot but not *too* hot, and maybe you’ve just finished weeding the garden or, let’s be real, just thinking about weeding it. Anyway, my brain went straight to popsicles. Not the sugary kind from the store (though no judgement if that’s your jam!), but something homemade and kinda healthy-ish. And my go-to? These absolutely delicious, irresistible picture of Strawberry Yogurt Popsicles. Seriously, they are SO good and honestly, shockingly simple to whip up. My youngest, bless his heart, calls them ‘pink frosty sticks,’ and he’s not wrong. I remember the first time I made these, it was totally on a whim because I had a carton of yogurt and some strawberries that were *just* about to turn. Best impulse decision ever!
Why These Are Just the Best
Alright, why should *you* bother making these? Well, first off, they are crazy easy. Like, mix-three-things-and-freeze easy. You don’t need to be some kind of kitchen wizard, trust me. (I once set off the smoke alarm making toast, so if I can do it, you can too.) I make this when the kids are driving me up the wall and I need a quick win, or when we have friends over and I want a healthy-ish treat that everyone scarfs down. My family goes absolutely bonkers for them because they’re creamy but still icy and taste exactly like fresh strawberries kissed by the sun. They’re also surprisingly filling thanks to the yogurt protein. Plus, they’re way cheaper to make than buying fancy ones. And let’s be honest, who doesn’t want a delicious, irresistible picture of Strawberry Yogurt Popsicles waiting in the freezer? They just *look* happy.
Gather Your Stuff (Ingredients)
This is the easy part. You only need a few things.
* **Strawberries:** About 2 cups, hulled. Fresh ones are the bomb here, but honestly, frozen work too if you thaw ’em out a bit first. If I’m in a huge hurry, I’ll sometimes use thawed frozen ones instead of faffing about with fresh.
* **Yogurt:** About 1.5 to 2 cups. I like plain Greek yogurt because it makes them super creamy and tangy, but any plain yogurt works. Full fat is my preference for creaminess, but low-fat is totally fine! My Aunt Carol always insisted on some fancy organic brand, but truthfully, any decent plain yogurt is gonna rock.
* **Sweetener:** However much you like, maybe 2-4 tablespoons to start? This is totally to taste. Honey, maple syrup, or agave are all great. I usually use honey because it’s what I have on hand. You could even skip it if your strawberries are super sweet, but a little bit really makes the flavors pop.
* **(Optional but fun!)** A splash of vanilla extract, maybe half a teaspoon. It adds a little something extra.
See? Simple!
Let’s Get This Show on the Road (Directions)
This is where the magic happens, though it barely feels like cooking.
1. **Prep the Strawberries:** Wash those strawberries and hull ’em. If they’re frozen, let ’em thaw a bit. Give ’em a rough chop if they’re big, but don’t worry about being perfect.
2. **Blend Time:** Pop the strawberries into a blender or food processor. Add the yogurt and your sweetener of choice (and vanilla if you’re using it). Now, blend it all up until it’s super smooth. You want it creamy, no big chunks unless you *like* chunks, which is fine too! Don’t worry if it looks a bit, well, pink mushy right now – it always does!
3. **Taste Test:** This is crucial. Grab a spoon and taste it. Is it sweet enough? Strawberry-y enough? Need more tang? Adjust the sweetener or maybe add a couple more strawberries if you want. This is where I usually sneak a taste… maybe two.
4. **Pour!:** Carefully pour the mixture into your popsicle molds. Don’t fill them *all* the way to the top, maybe leave a little space ’cause they expand slightly when they freeze. If you don’t have molds, small paper cups work great, just pop a stick in once they’re partially frozen.
5. **Add Sticks:** Put the popsicle sticks in. If you’re using molds with lids, follow their instructions. If using cups or simpler molds, wait maybe an hour or two until they’re slushy, then stick the sticks in so they stand up straight. (Actually, I find it works better if you just put the sticks in right away, they might lean but who cares?)
6. **Freeze ‘Em Up:** Pop the whole contraption into the freezer. This is the hardest part – waiting! They’ll need at least 4-6 hours, maybe longer depending on your freezer and the size of the molds. Ideally, leave ’em overnight.
7. **Unmold and Enjoy:** Once they’re frozen solid, run the mold under warm water for a few seconds to loosen them up. Then, gently pull ’em out! Ta-da! Delicious, irresistible picture of Strawberry Yogurt Popsicles ready to eat.
Stuff I Figured Out (Notes)
* Okay, so sometimes the bottom part of the popsicle can be slightly sweeter than the top. I *think* it’s because the sweetener settles a tiny bit before freezing. Not a big deal, but something I noticed.
* If your mixture seems too thick to pour easily, add a tiny splash of milk (dairy or non-dairy) to thin it out a smidge. Don’t add too much though, or they’ll be too icy.
* Using really ripe, in-season strawberries makes a HUGE difference in flavor. Like, night and day.
Things I Tried (Variations)
I love messing around with recipes, so naturally I’ve tried a few twists on these:
* **Mixed Berry:** Swap out half the strawberries for blueberries, raspberries, or blackberries. Works beautifully! The color gets a bit more purpley or darker, but the flavor is awesome.
* **Banana Swirl:** Blend just the strawberries and yogurt, then mash a ripe banana with a little extra sweetener. Swirl the banana mixture into the molds *before* adding the main mix. It gives it a lovely creamy swirl. This one is usually a hit!
* **Coconut Creamy:** Swap half the Greek yogurt for full-fat canned coconut milk (the thick stuff on top). Gives it a tropical vibe. Yum.
* **The Green One (Didn’t Work So Well):** I tried adding a handful of spinach once, thinking I could sneak in some greens. The kids looked at me like I had three heads, and honestly, the color was kinda swampy. The flavor was… fine, but the visual was a hard pass. Live and learn, right?
What You’ll Need (Equipment)
Honestly, not much fancy stuff required.
* A **blender** or **food processor** to make it smooth.
* **Popsicle molds!** There are tons of kinds out there. Get silicone ones if you want easy unmolding, or the classic plastic ones work fine too. If you don’t have molds, like I said, small paper cups (the kind you use for samples or medicine, honestly) and popsicle sticks are a perfectly good workaround. Just tear the cup off when it’s frozen.
And that’s really it!
Keeping ‘Em Fresh (Storage)
Once they’re frozen and you’ve unmolded them, the best way to store them is wrapped individually in plastic wrap or beeswax wraps and then popped into a freezer bag or airtight container. This stops them from getting that weird freezer burn taste.
Though honestly, in my house, they never last more than a day or two! They get eaten way too fast for storage to be a big issue. Out form the freezer, into happy hands!
How I Like ‘Em (Serving Suggestions)
Straight up! Right out of the freezer on a hot day is perfection. Sometimes, if I’m feeling extra fancy (which is rare, let’s be real), I might dip the very tip in some melted white chocolate and sprinkle on a few chopped pistachios, but that’s totally unnecessary. My mom always just served them on the back porch after we’d been running around outside, and that feels like the right way to do it.
Learning From My Screw Ups (Pro Tips)
* **Don’t Overfill:** I once tried filling the molds right to the brim thinking ‘more popsicle for my buck!’. Nope. They expanded a tiny bit and then were a pain to get the lids on, and some even overflowed slightly. Not a disaster, but messy. Don’t do that. Leave a little gap.
* **Blend Until *Really* Smooth:** If you leave tiny bits of strawberry, they can freeze harder and make the popsicle a bit icy or grainy in spots. Blend it longer than you think you need to for maximum creaminess.
* **Taste Before Freezing:** Seriously, don’t skip step 3 in the directions. Once it’s frozen, you can’t really adjust the sweetness or flavor easily. Get it right before it goes in the molds. I once tried rushing this step and ended up with a batch that wasn’t sweet enough, and it just wasn’t the same.
Burning Questions? (FAQ)
* **Can I use frozen strawberries?** Yep! Just let ’em thaw out a bit first. Might need slightly less sweetener as frozen fruit can taste a little sweeter sometimes.
* **What about flavored yogurt?** You *could*, but honestly, I find plain yogurt with fresh fruit gives the best, cleanest flavor. Flavored yogurts often have added sugars and stuff that can make the popsicle texture a bit off, or the flavors can clash. Stick to plain for these, trust me.
* **How long do they last in the freezer?** If you manage to store them properly (haha!), probably a couple of months? But really, aim to eat ’em within a week or two for best taste and texture.
* **Are these actually healthy?** Compared to most store-bought popsicles loaded with corn syrup and artificial colors? Absolutely! They’ve got fruit, protein from the yogurt, and you control the sugar. They’re a great healthy-ish treat.
* **My popsicles are too hard/icy! What went wrong?** Hmm, usually that means there’s too much water in the mix compared to solids (like yogurt fat or sugar). Make sure you used Greek yogurt for creaminess if possible, or next time, maybe use a little less fruit and a little more yogurt, or add just a *touch* more sweetener (sugar helps keep ice crystals smaller).
Hope you give these Delicious Strawberry Yogurt Popsicles a try! They are truly simple and just taste like pure summertime happiness. Enjoy!