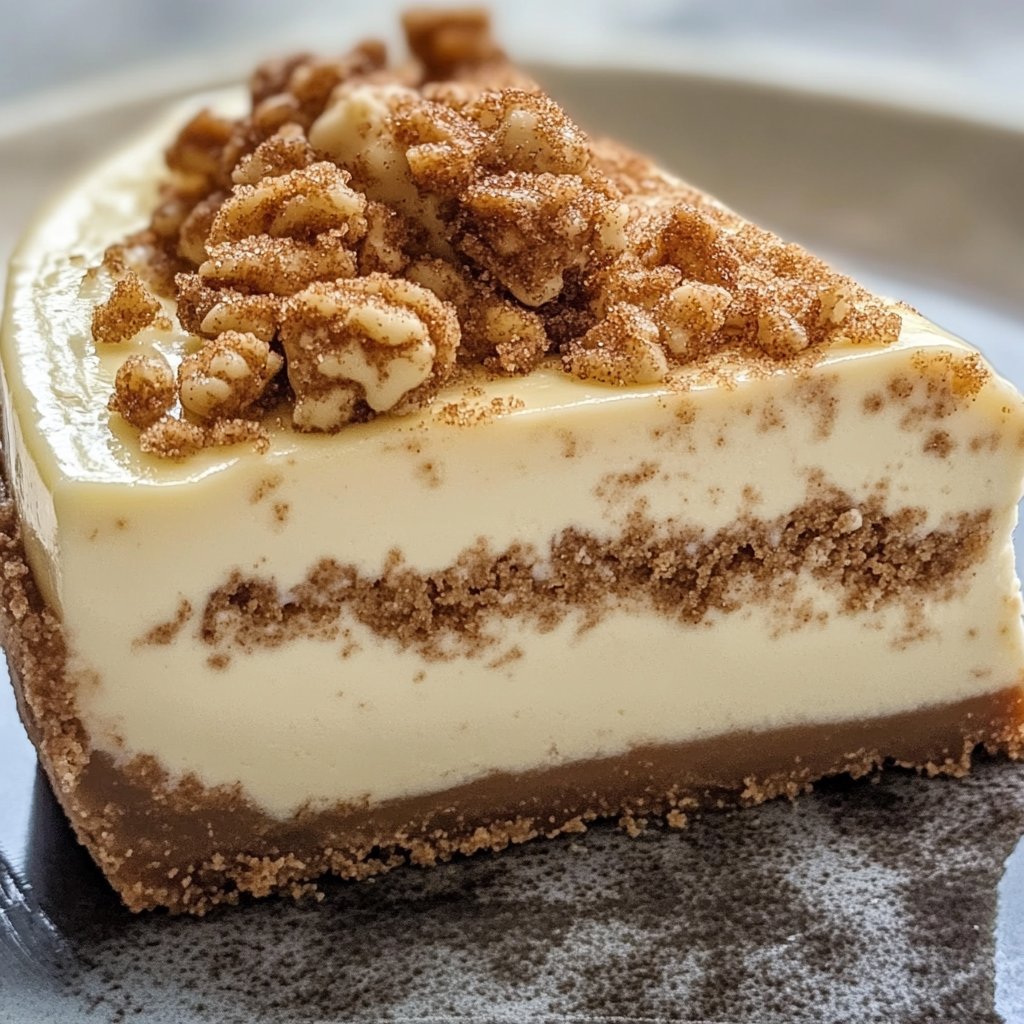
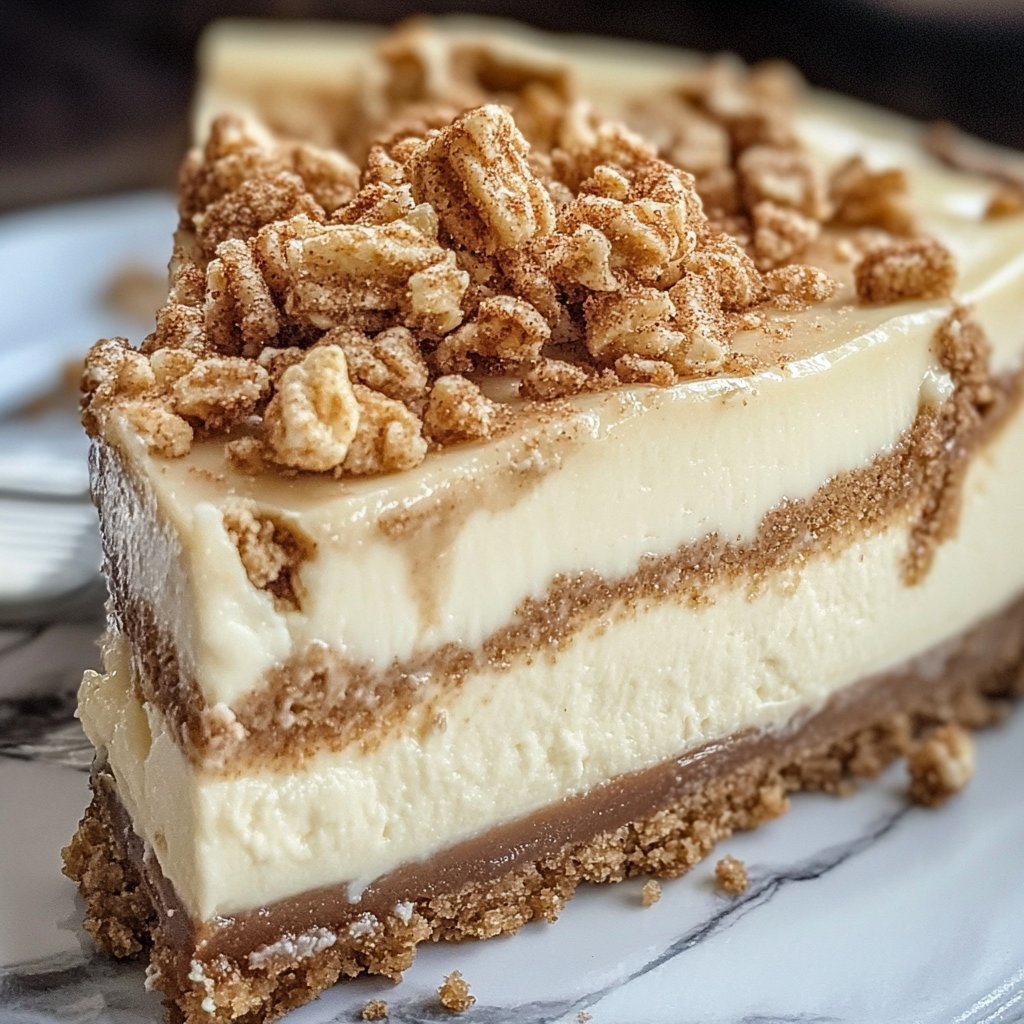
Cinnamon Crunch Cheesecake Recipe
Alright folks, gather ’round for cheesecake time!
Okay, so let me tell you about this cheesecake. This isn’t just any cheesecake; it’s the kind that makes people get all quiet after the first bite, maybe even close their eyes for a second. I first fiddled with this recipe years ago after trying a similar one somewhere and thinking, ‘Okay, but what if we *really* leaned into the cinnamon crunch?’ And let me tell ya, it was a game changer. My poor stand mixer has probably seen more cheesecake batter than anything else. It’s just a happy memory maker, this cake is.
Why I Keep Coming Back to This One (and Why You Will Too)
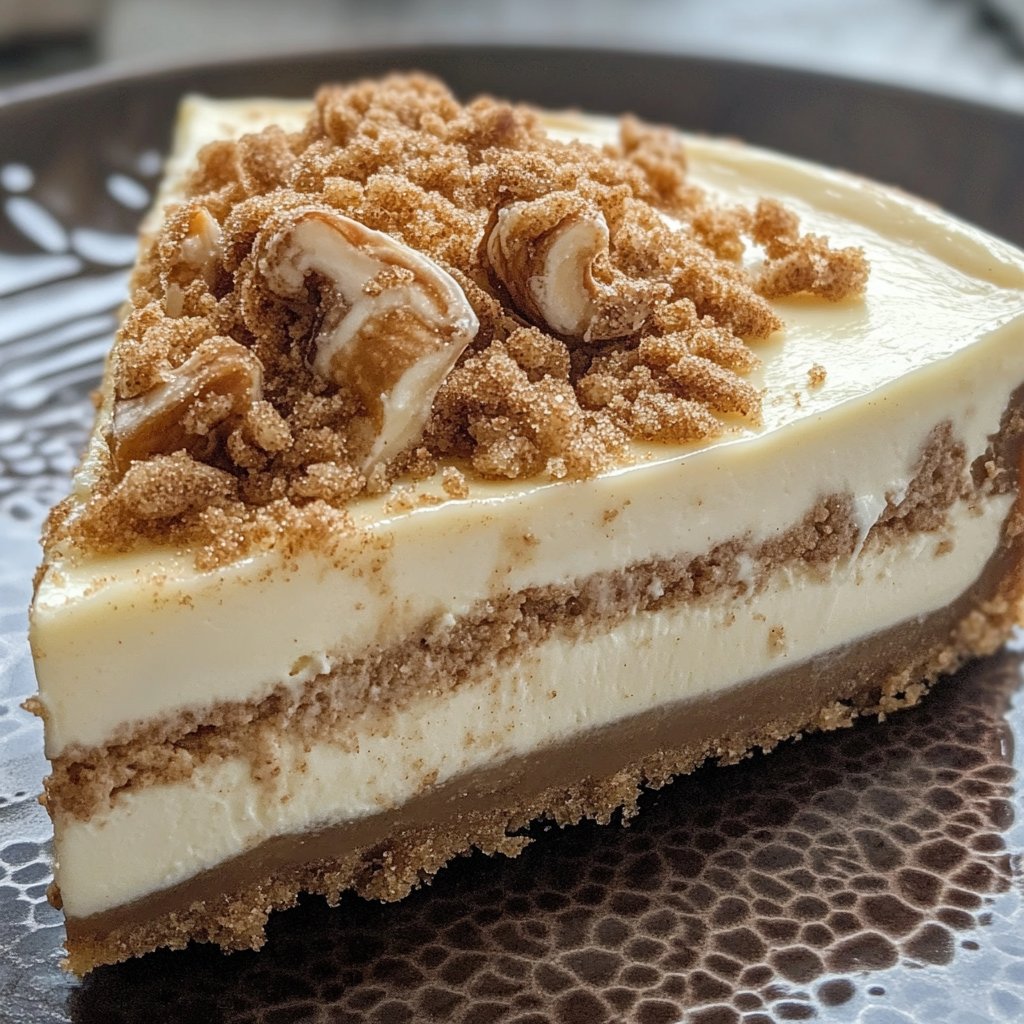
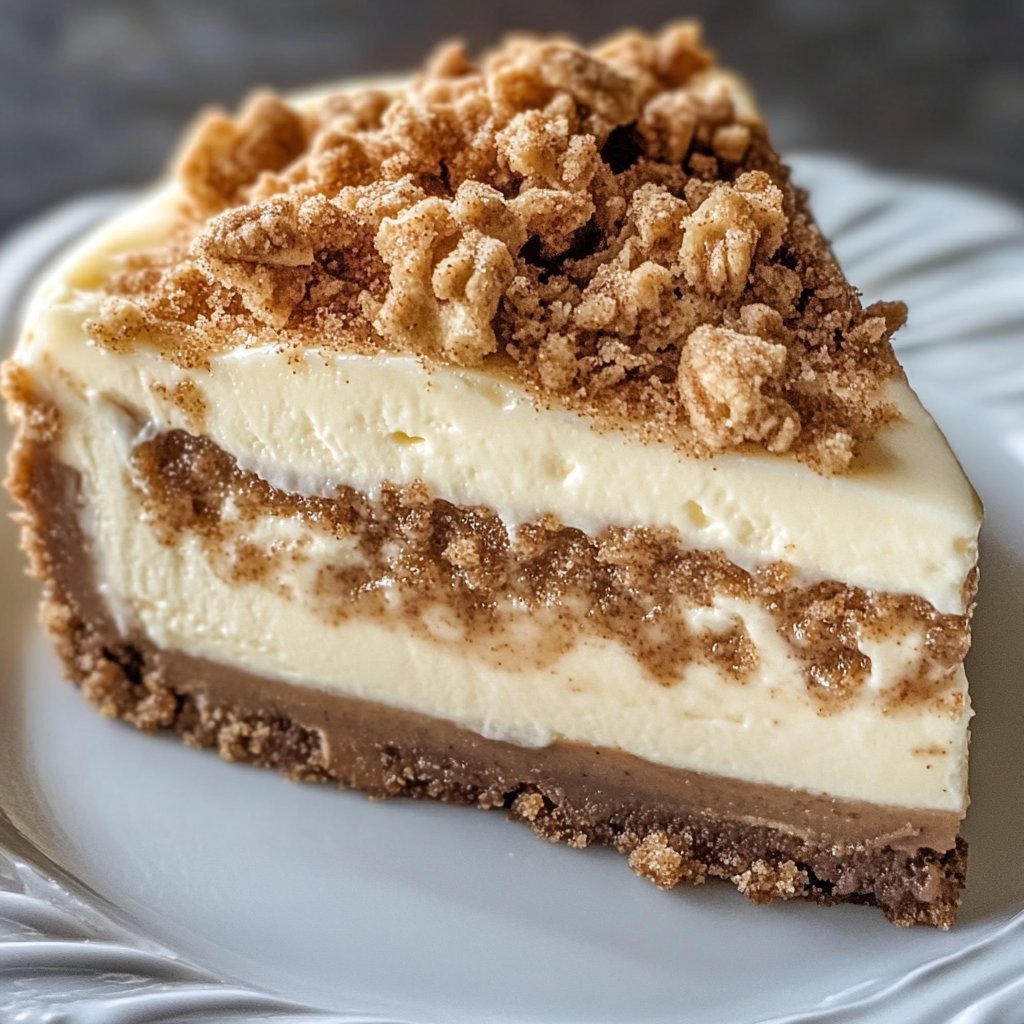
Honestly? It’s the crunch topping. Cheesecake is great, don’t get me wrong, but that sugary, cinnamony, buttery crumble? It’s addictive! Like, seriously. My kids (and let’s be real, me) sneak spoonfuls of the unbaked crumble sometimes (shhh, don’t tell). It just adds this amazing texture and spice that takes a regular cheesecake to a whole new level. Plus, it looks kinda fancy without being *that* much extra work, you know? I make this for holidays, birthdays, or just when I’ve had a week that needs a serious sweet reward. It’s a real crowd pleaser, every single time.
Stuff You’ll Need (The Goodies List)
Here’s the rundown. Try to get good quality stuff, especially the cream cheese, it really does make a difference. Sometimes I use store brand, and it’s fine, but Philly Cream Cheese just hits different, y’all.
For the Crust:
- About 1 ½ cups graham cracker crumbs (that’s like, one and a half sleeves of crackers, crushed)
- ½ cup unsalted butter, melted (one stick, easy peasy)
- ¼ cup granulated sugar
- ½ teaspoon ground cinnamon
For the Cheesecake Filling:
- Four 8 ounce blocks (or 2 lbs total) of full fat cream cheese, softened. Seriously, softened is key! Leave it out for a couple hours.
- 1 ¾ cups granulated sugar
- ¼ cup all purpose flour (helps prevent cracks, fingers crossed)
- 1 teaspoon ground cinnamon
- ½ teaspoon ground nutmeg (freshly grated is amazing if you have it!)
- ¼ teaspoon salt
- 1 teaspoon vanilla extract (the good stuff!)
- 4 large eggs, plus 2 large egg yolks (make sure they are at room temp too!)
- ½ cup sour cream or plain Greek yogurt (full fat again, we’re making cheesecake not dieting)
For the Cinnamon Crumble Topping:
- ½ cup all purpose flour
- ½ cup granulated sugar
- ¼ cup packed light brown sugar
- 1 ½ teaspoons ground cinnamon
- ¼ teaspoon salt
- ½ cup unsalted butter, cold and cut into small cubes (this is key for that crumbly texture!)
- Preheat your oven to 350°F (175°C). Get your 9 inch springform pan ready. Some people butter it, I usually don’t bother, the butter in the crust does the job.
- In a medium bowl, stir together the graham cracker crumbs, melted butter, sugar, and cinnamon until it looks like wet sand.
- Press this mixture firmly into the bottom of your springform pan. You can use the bottom of a glass to really pack it down. Try to get it even.
- Bake the crust for about 8-10 minutes. This helps it set up nice and firm. Let it cool completely on a wire rack.
- While the crust cools (or before, doesn’t really matter), make the crumble topping. In a medium bowl, whisk together the flour, granulated sugar, brown sugar, cinnamon, and salt.
- Cut in the cold, cubed butter. You can use a pastry blender, two forks, or your fingers. Work it until it forms coarse crumbs. Don’t overmix! You want some bigger clumps in there for maximum crunch factor. Pop this in the fridge while you make the filling.
- Reduce your oven temperature to 325°F (160°C). This lower temp is better for cheesecake to prevent cracking.
- In the bowl of a stand mixer (or a large bowl with a hand mixer), beat the softened cream cheese on medium speed until it’s completely smooth and creamy. NO LUMPS! This is crucial. Scrape down the sides and bottom of the bowl often.
- Gradually add the granulated sugar, flour, cinnamon, nutmeg, and salt. Beat until just combined. Don’t whip too much air into it.
- Beat in the vanilla extract.
- Add the eggs and egg yolks, one at a time, beating on low speed just until each is incorporated. Don’t overmix! Overmixing after adding eggs is a common cause of cracks. This is where I usually take a little taste test of the batter… you know, for quality control.
- Gently stir in the sour cream or yogurt until just combined.
- Pour the filling over the cooled crust in the springform pan. Smooth the top with a spatula.
- Now, sprinkle that glorious cold crumble topping evenly over the top of the cheesecake filling. It might seem like a lot, but trust the process!
- Get ready for a water bath. This is key for that silky texture and to help prevent cracking. Wrap the bottom of your springform pan *really* well in heavy duty aluminum foil – I usually use two layers just to be safe. You don’t want any water getting in! Here’s a good visual guide on wrapping your pan: How to Wrap a Springform Pan
- Place the wrapped pan in a larger roasting pan. Carefully pour hot water into the roasting pan until it comes about halfway up the sides of the springform pan.
- Carefully transfer the whole shebang to the preheated oven (325°F / 160°C).
- Bake for 60-75 minutes. The center should be mostly set but still have a slight jiggle to it when you gently nudge the pan. The edges will look more firm. Don’t worry if it looks a *little* jiggly, it will continue to set as it cools.
- Turn off the oven, crack the door open about an inch (you can stick a wooden spoon in the door), and let the cheesecake cool in the oven for another hour. This slow cooling helps prevent cracks.
- Remove the cheesecake form the water bath and the oven. Let it cool completely on a wire rack.
- Once it’s totally cool, cover it loosely with plastic wrap and refrigerate for at least 4-6 hours, but overnight is really best for flavor and texture. It’s like magic happens in the fridge overnight.
- When you’re ready to serve, run a thin knife around the edge of the pan before releasing the springform side. Enjoy the compliments!
- Room temperature ingredients really *do* matter for cheesecakes. Cold cream cheese is a lumpy nightmare.
- Don’t overbeat the batter, especially after adding the eggs. Air bubbles are the enemy of smooth, crack free cheesecake.
- A water bath is a bit of a faff, yes, but it makes a HUGE difference in the final texture. Worth the effort.
- Cooling slowly in the oven is another crack prevention trick I swear by.
- 9 inch springform pan
- Large roasting pan (for the water bath)
- Stand mixer or hand mixer
- Mixing bowls
- Measuring cups and spoons
- Pastry blender, forks, or just your clean hands for the crumble
- I once tried rushing the cooling process and took it out of the oven too fast. Instant crack down the middle. Lesson learned: be patient!
- Not wrapping the pan tightly enough form the water bath means a soggy bottom crust. Use heavy duty foil and make sure it’s sealed.
- Don’t press the crumble topping *into* the batter too much, just sprinkle it on top. You want it to sit mostly on the surface to get crispy.
Let’s Get This Party Started (The How To)
Alright, deep breaths! Cheesecake can seem intimidating, but we got this. Just take your time.
First, the Crust:
Next Up, the Crumble!
The Main Event: The Filling
Assembly and Bake Time!
Things I’ve Learned (Notes from the Kitchen Battlefield)
Mix It Up! (Variations I’ve Tried)
I’ve played around with this recipe a bit. You could try adding a little espresso powder to the filling for a coffee kick, which is pretty good. I also sometimes swirl a bit of caramel sauce into the top of the filling before adding the crumble. Adds another layer!
One time, I tried making mini cheesecakes in muffin tins with paper liners. The crust bit was tricky to get right, and the crumble topping kind of overwhelmed them. So yeah, stick to the big springform for this one, it just works best.
Tools That Help (Equipment Check)
Okay, you *could* probably mix the whole thing by hand if you had to, especially if your cream cheese is super soft, but a mixer makes that smooth, lump free filling so much easier.
Keeping It Fresh (Storage)
Keep any leftovers (ha!) in the fridge, covered. It should last 3-4 days, though honestly in my house it never makes it past 24 hours. You can freeze slices too, wrapped really well, but the texture of the crumble can change a little.
Serving Suggestions (My Faves)
This is amazing just as it is, but a dollop of whipped cream never hurt anybody. Sometimes I drizzle a little extra melted butter and a sprinkle of cinnamon sugar on top right before serving, just for that extra oomph. A side of fresh berries is also nice to cut the richness.
Real Talk (Pro Tips from My Screw-Ups)
FAQs (Stuff People Ask Me)
*Can I use less sugar?*
Yeah, you could probably reduce the sugar in the filling by maybe ¼ cup, but I wouldn’t mess with the crust or crumble sugar too much, it affects the texture.
*My cheesecake cracked! What did I do wrong?*
Oh honey, it happens! Usually, it’s from overmixing the batter, adding cold ingredients, or cooling too fast. It’s still gonna taste amazing, promise! Just cover it with whipped cream or a ganache, nobody will know! Check out this article on Why Cheesecakes Crack, it has some good tips.
*Do I *really* need a water bath?*
Look, if you absolutely hate the idea, you can skip it, but your cheesecake might be drier and definitely more likely to crack. It creates a steamy environment that bakes the cheesecake gently and evenly. Worth it!
*Where do you get your vanilla extract?*
I like Nielsen-Massey or King Arthur Baking’s vanilla. Good quality vanilla is pricey but makes a difference. King Arthur Pure Vanilla Extract is solid.
Go Forth and Bake!
So there you have it. My go to Cinnamon Crunch Cheesecake recipe. Give it a whirl, be patient, and prepare for everyone to ask for the recipe. Happy baking, folks!