Sirop de fleurs de sureau au citron
Okay, hey there! So, you know how some recipes just feel like pure, bottled sunshine? Well, this elderflower and lemon syrup? Yeah, that’s it for me. Making sirop de fleurs de sureau is one of those things I look forward to every spring when the elderflowers are out – it’s like a little ritual. I remember the first time I tried making it, years and years ago, I was convinced I was going to mess it up somehow, but honestly, it’s surprisingly forgiving. And the smell while it’s simmering? Oh. My. Gosh. Worth it for that alone, I reckon.
Why I Always Make This Stuff
Honestly? I make this when I want to feel fancy without doing much actual work. Seriously, pouring a bit of this into some sparkling water (or let’s be real, a cheeky gin and tonic) makes you feel like you’re sitting on a terrace in the south of France, even if you’re just in your back garden wrestling with aphids. My family goes crazy for this because it’s not overly sweet like some store-bought things, and that hint of lemon just lifts everything. It’s perfect for summer parties (remember parties?) or just making Tuesday afternoon feel a bit special. Plus, you can use it in cocktails, drizzled on pancakes, over ice cream… the possibilities are endless! (Maybe not *endless*, but you get the drift.)
Okay, What You’ll Need
Right, ingredient time! Nothing too wild here, thankfully.
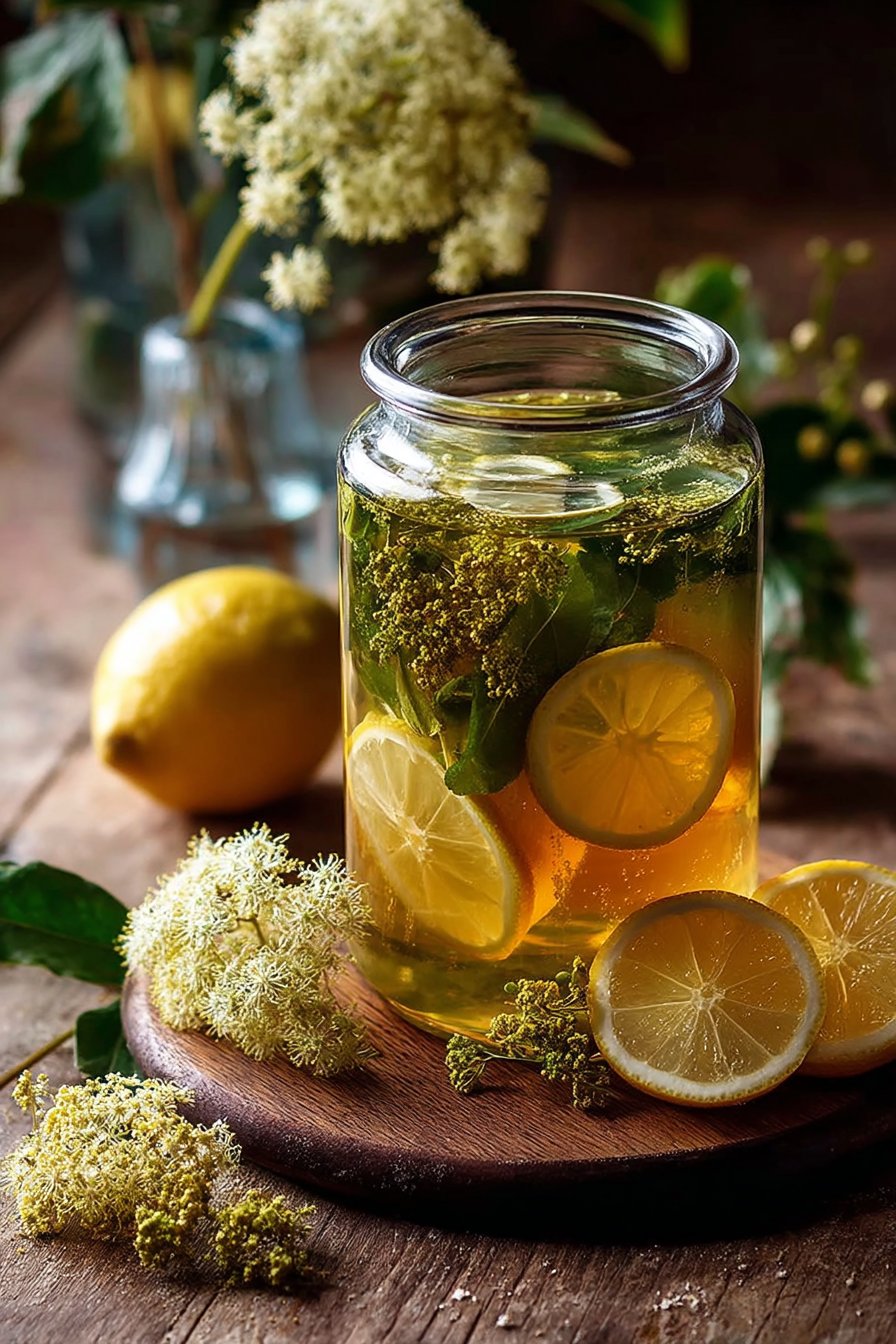
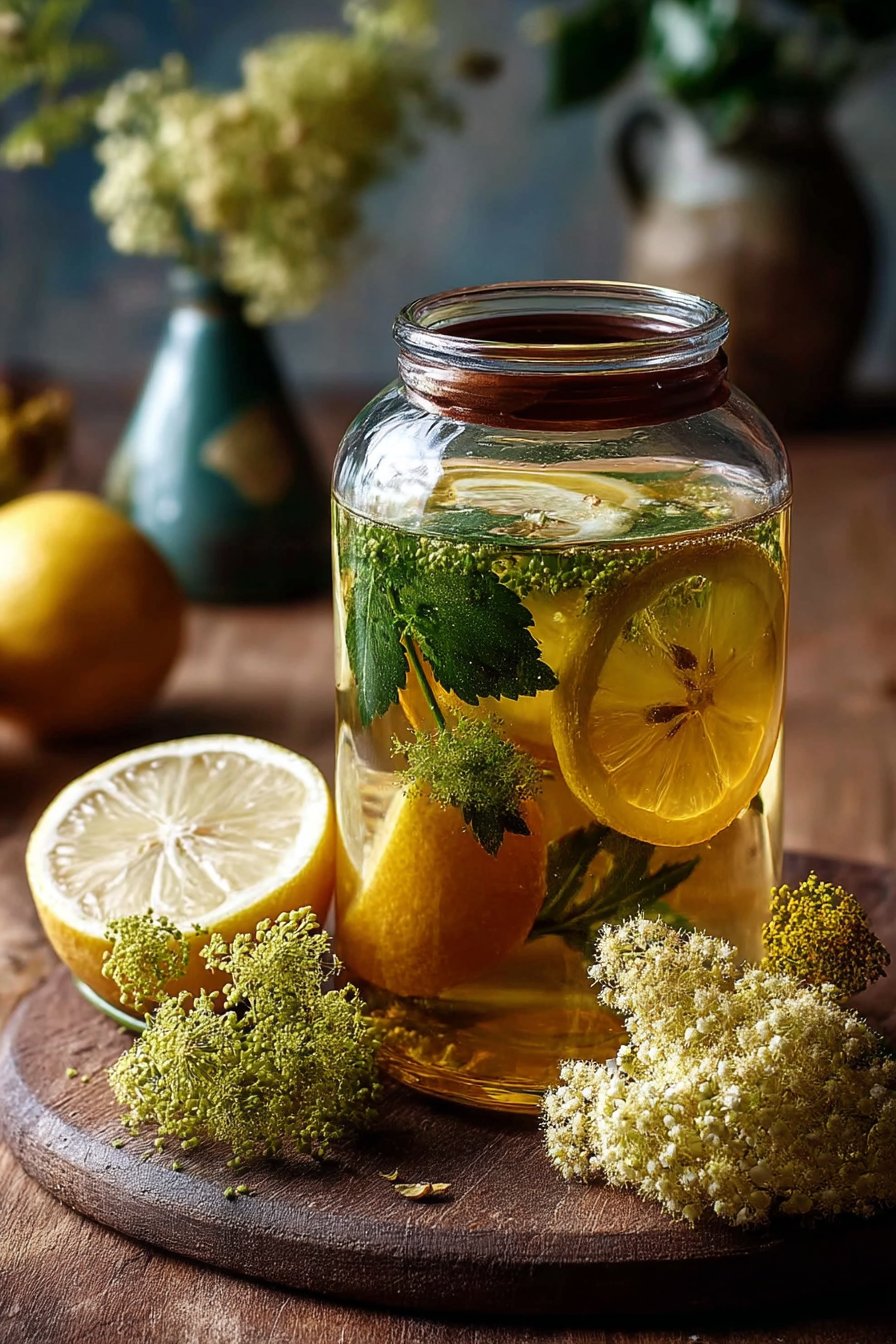
- About 25-30 nice big elderflower heads. You want them fresh, creamy white, and shake them *really* well before you pick them to get rid of any little critters. Don’t wash them though, you’ll lose the pollen, and that’s where a lot of the magic is! Be sure you’re identifying elderflower correctly before picking, maybe check a good foraging guide if you’re not sure.
- 1 litre of water. Just regular tap water is fine.
- 1 kg of sugar. Caster sugar dissolves easier, but granulated works too. Honestly, use whatever you have, I’ve even used a mix before.
- 2 unwaxed lemons. Organic is nice if you can get them, but the main thing is unwaxed because you’re using the zest.
- Citric acid. You can usually find this with baking stuff or preserving supplies. You’ll need about 25-30 grams. It helps preserve the syrup and gives it that lovely tartness that balances the sweetness. My grandmother always insisted on it, and she knew her stuff!
Let’s Get Cooking… Or Not? It’s Easy!
This isn’t really cooking, more like… infusing? It’s super simple.
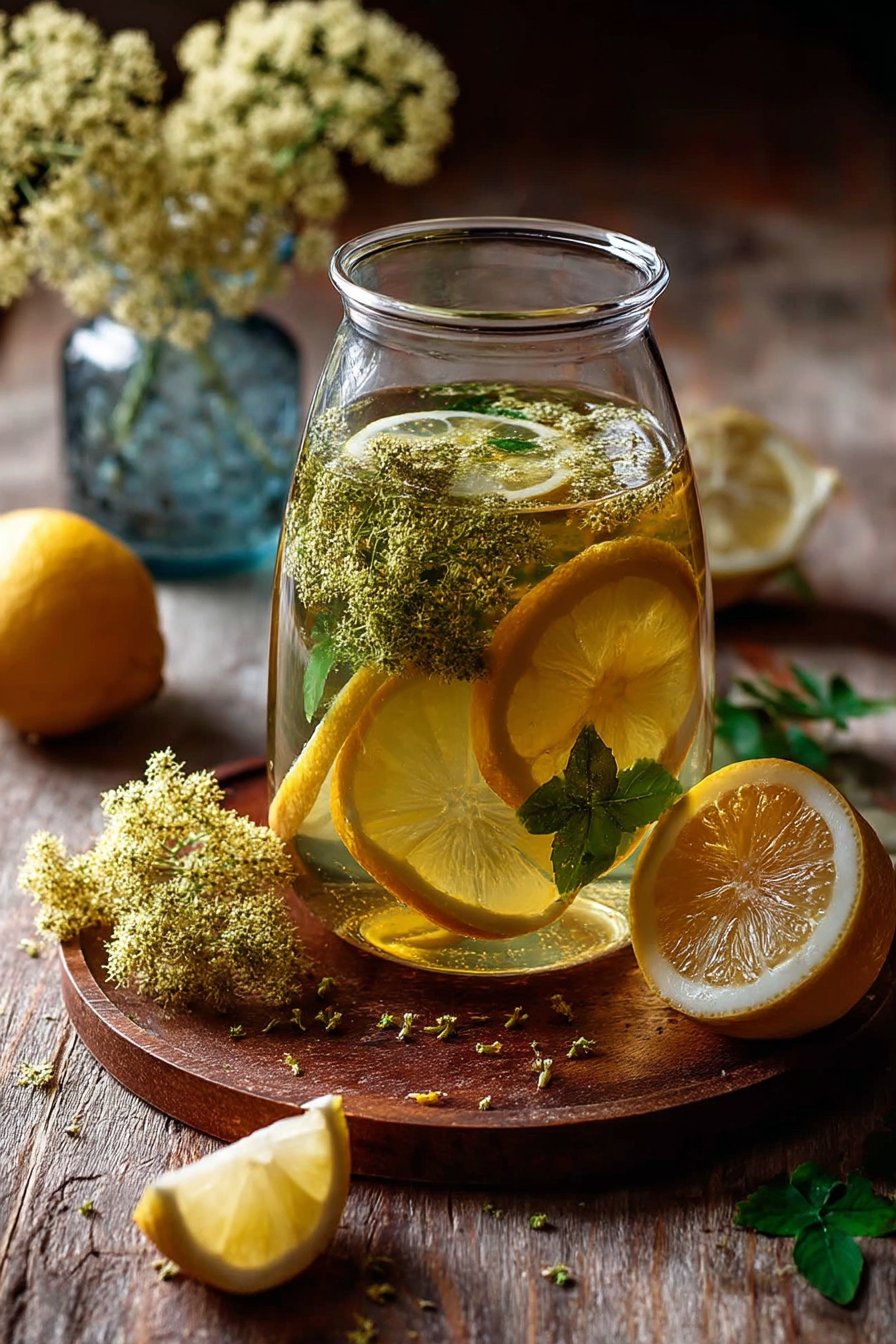
- Grab a really big bowl, preferably not metal (glass or ceramic is best). Give your elderflower heads one last shake outside to evict any lingering bugs.
- Peel the zest form the lemons, try not to get too much of the white pith as it can be bitter. Slice the zested lemons into rounds.
- Pop the elderflower heads, lemon zest, and lemon slices into your big bowl.
- Boil the water in a kettle or on the hob. Once it’s boiling, pour it over the elderflower and lemons in the bowl.
- Cover the bowl with a clean tea towel or cling film and leave it to infuse. This is the important bit! You need to leave it for at least 24 hours, but honestly, I find it works better if you leave it for 48 hours. Just find a cool spot for it to hang out. Don’t worry if it looks a bit murky – it always does!
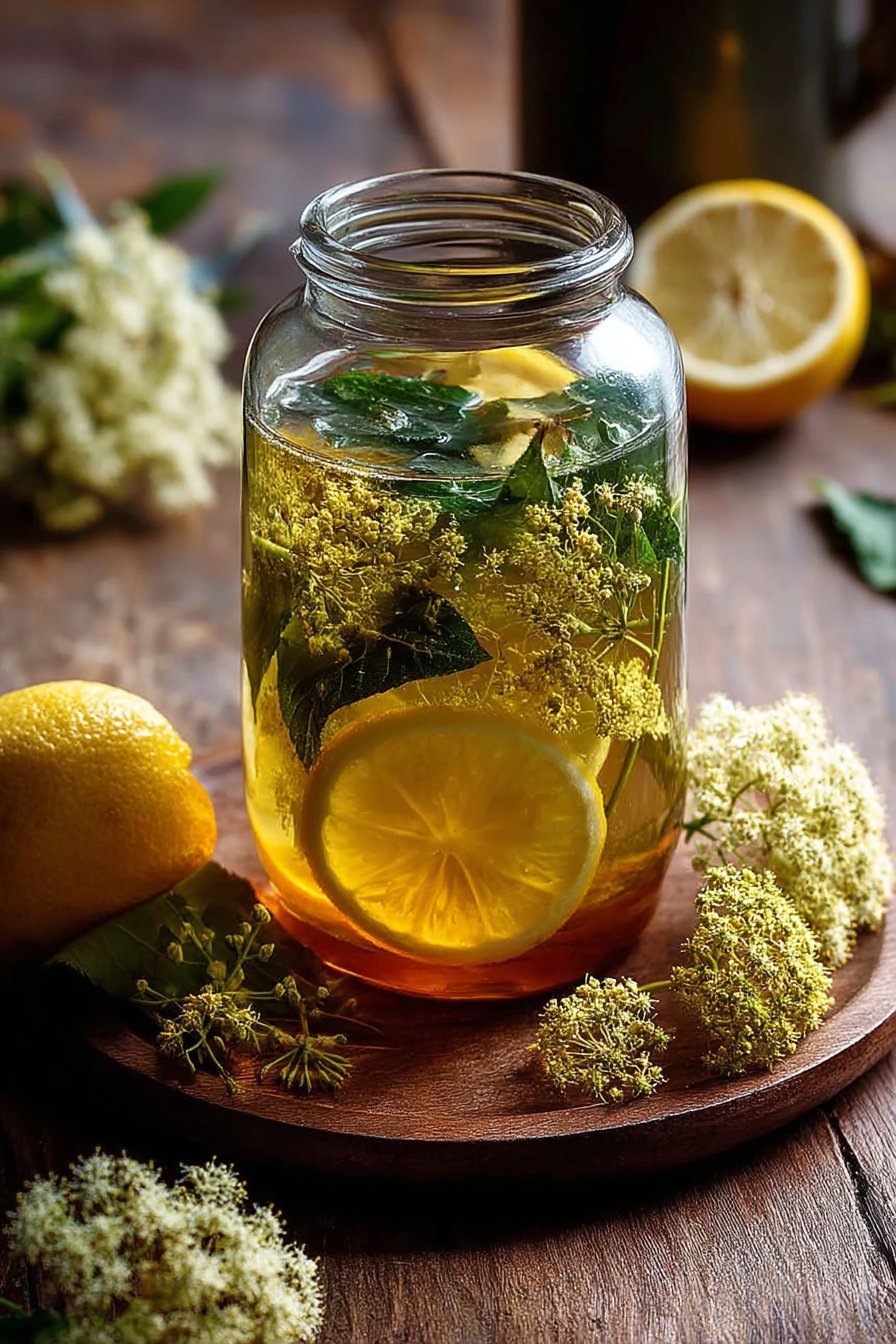
- After its long soak, strain the liquid. I usually strain it first through a sieve to get rid of the big bits, then through muslin cloth or a jelly bag to get it really clear. This takes a bit of time, so be patient. This is where I usually sneak a little taste of the murky stuff just to get excited!
- Pour the strained liquid into a clean pan. Add the sugar and citric acid.
- Heat the mixture gently, stirring until all the sugar has completely dissolved. Don’t let it boil rapidly, just a gentle simmer is fine for a minute or two once the sugar is gone.
- Let it cool slightly, then pour the warm syrup into sterilised bottles. You can sterilise bottles by washing them well and then heating them in an oven at 140°C (120°C fan/Gas mark 1) for about 15-20 minutes, or using a proper sterilising solution if you prefer. Screw the lids on tight.
Stuff I’ve Learned Along the Way
Okay, so, I’ve made this *many* times, and here are a few things I’ve figured out:
- Using too many lemon *slices* can make it a bit bitter, just use the zest and maybe 2-3 slices max for the infusion if you really want, but I usually just stick to the zest and citric acid for the lemony punch.
- Make absolutely sure the sugar is dissolved before you bottle it. If you don’t, you might get crystals forming in the bottom later, which isn’t the end of the world but looks a bit rubbish.
- Straining properly is key for a clear syrup. Don’t skip the muslin step if you want it pretty!
Feeling Adventurous? Try These
I’ve played around a bit with this recipe. Adding a few mint leaves during the infusion can be lovely and refreshing. Sometimes I’ll throw in a vanilla bean, split lengthwise, which adds a really comforting, creamy note. Don’t add too much though, it can overpower the delicate elderflower. I once tried adding some ginger slices, thinking it would be warming, but it just tasted… weirdly muddy? Yeah, stick to vanilla or mint if you want to experiment, the ginger wasn’t a winner.
Tools of the Trade
You don’t need anything super fancy. A big bowl, a pan, a sieve, and some muslin or a jelly bag. Oh, and some sterilised bottles, obviously. If you don’t have muslin, a clean, old (but not holey!) pillowcase or thin tea towel can work in a pinch, though it might not be quite as clear.
Keeping It Sunshine-Ready
Once bottled and sealed, the syrup should keep for several months in a cool, dark place (like a pantry or cupboard). Once opened, keep it in the fridge and try to use it within 3-4 weeks. Though honestly, in my house it never lasts more than a day or two once someone remembers it’s there!
How I Like to Use It
My absolute favorite way is just mixed with ice cold sparkling water – about 1 part syrup to 4 or 5 parts water, depending on how sweet you like it. Add a slice of lemon or a sprig of mint. It’s also fantastic in cocktails, poured over fresh berries, or as a lovely addition to a fruit salad dressing. Sometimes, if I’m feeling particularly lazy, I’ll even just pour a tiny bit over vanilla ice cream. So good.
Lessons From My Syrup Fails
Okay, gather ’round, let me tell you about the times I messed up so you don’t have to! I once tried rushing the infusion step, only left it for about 8 hours, and regretted it because the elderflower flavour was really weak. Like, barely there. You *need* that long infusion time. Another time, I didn’t sterilise my bottles properly, and the syrup went cloudy and fuzzy after a week! Yuck. So yeah, sterilisation is crucial. Don’t be lazy with that part!
Got Questions? I’ve Got Answers!
Q: Can I use dried elderflowers?
A: Hmm, I wouldn’t really recommend it for this sirop recipe. The magic is really in the fresh pollen from the heads. Dried ones just don’t give you the same vibrant flavour or smell.
Q: It’s gone a bit cloudy in the bottle, is it okay?
A: If it’s just cloudy and smells fine, it’s probably just some sediment. That’s usually okay. If it looks fuzzy, smells weird, or you see actual mould? Chuck it, sadly. That’s why sterilising bottles is so important!
Q: How long do elderflowers last once picked?
A: Not long! They wilt quickly. Pick them in the morning when they’re freshest and ideally use them the same day, or at least within a few hours. Don’t leave them sitting around.
Q: I can’t find citric acid, can I skip it?
A: You *can*, but the syrup won’t be as tangy and the shelf life will be much shorter. You’d probably need to store it in the fridge and use it up really fast. It’s worth hunting down the citric acid if you can!
So there you have it! Go forth and make some sunshine in a bottle. Your future self (especially on a hot day!) will thank you. Happy infusing!