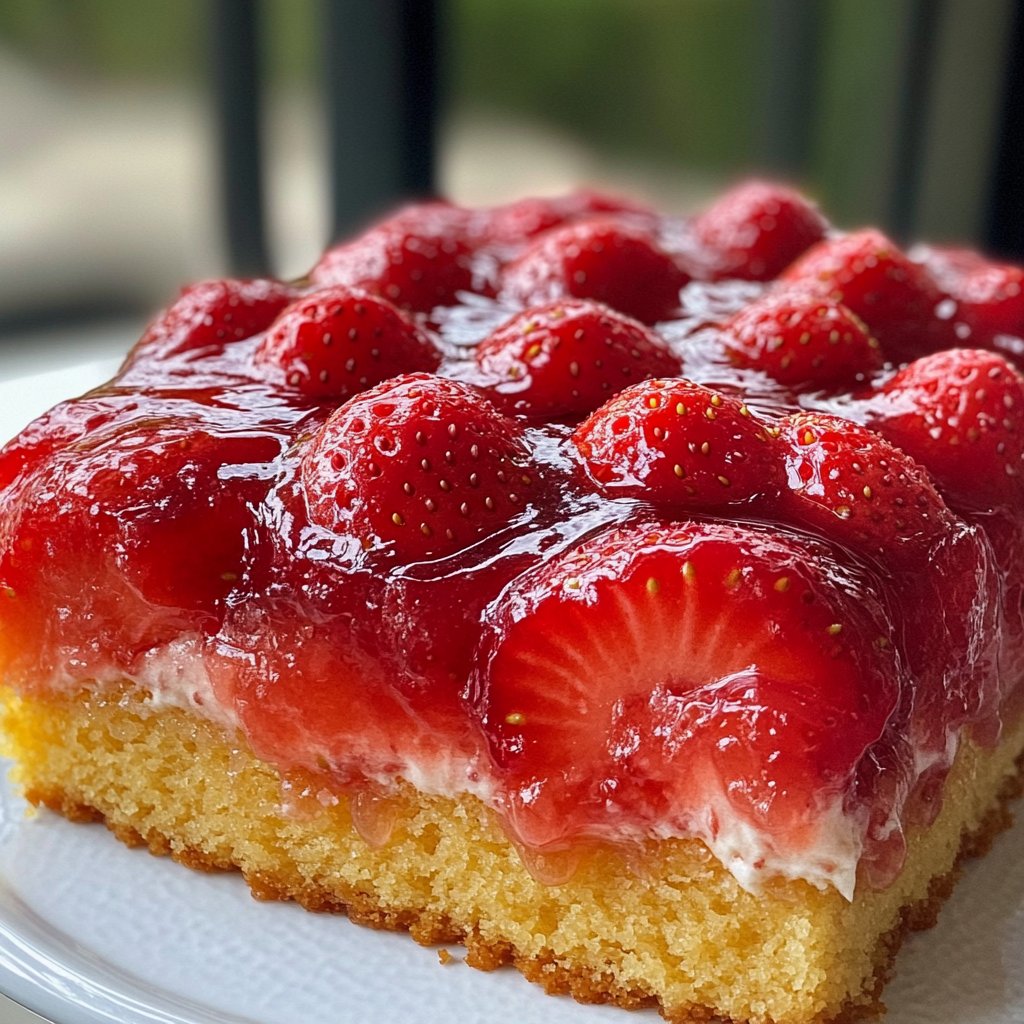
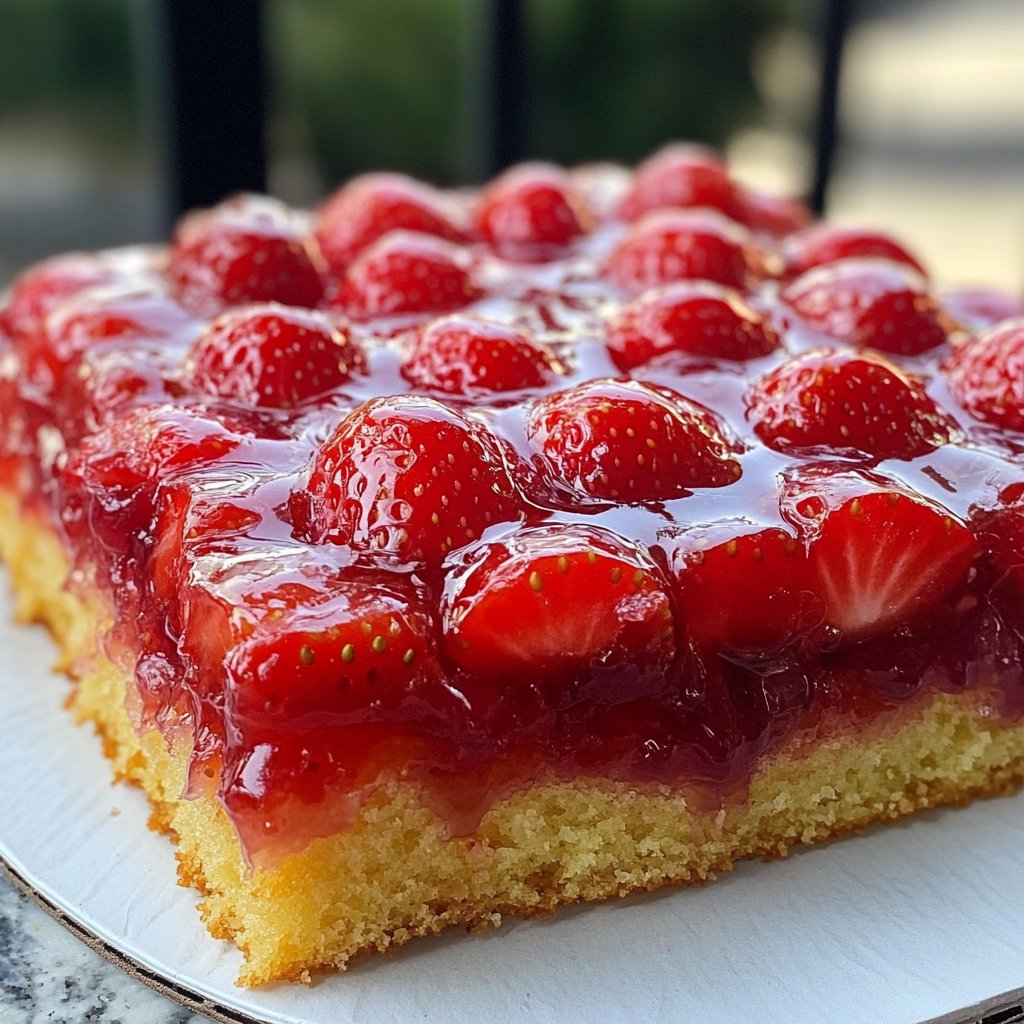
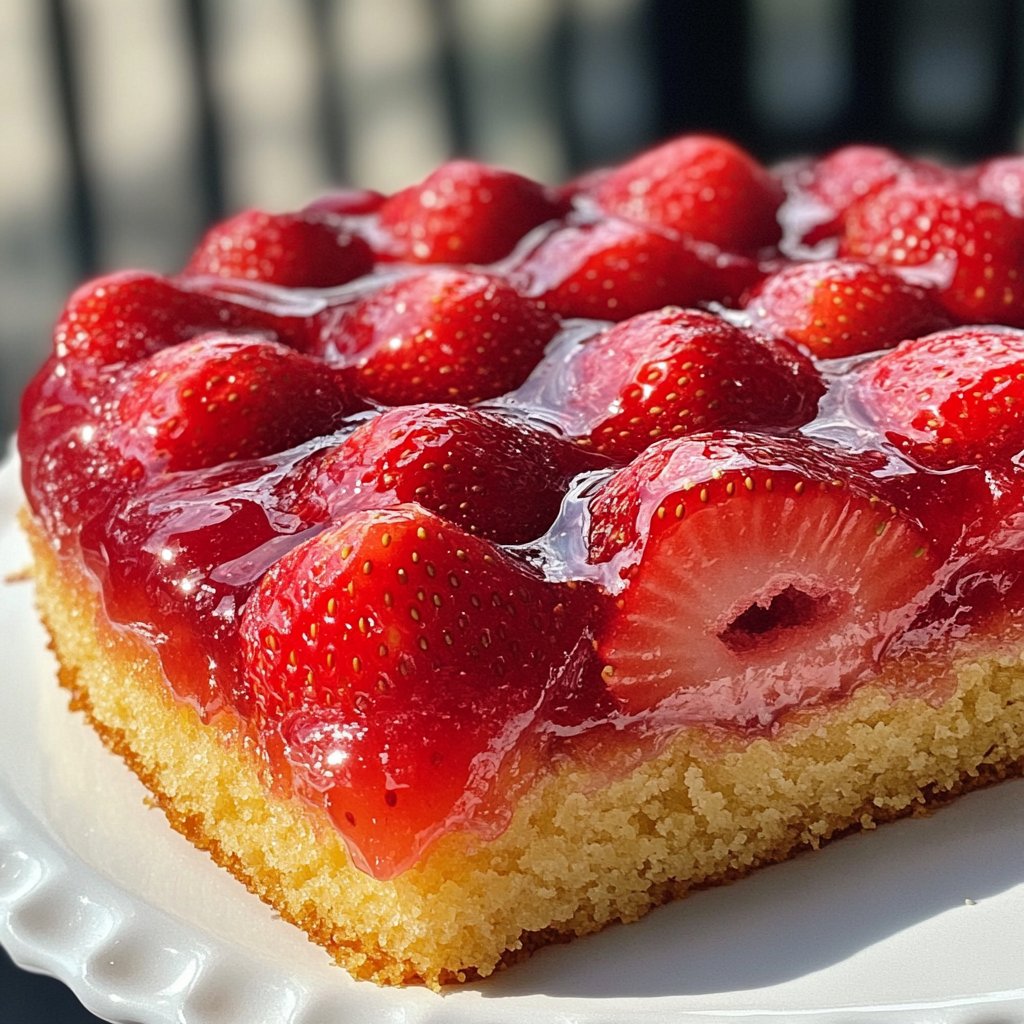
Strawberry Upside Down Cake Recipe
Okay, So About This Cake…
Hey friend! You know how sometimes you just crave something sweet and comforting, but you don’t want a fuss? That’s where this strawberry upside down cake recipe comes in. Seriously. It’s become my absolute favorite thing to whip up, especially when strawberries are looking all gorgeous and red at the market. I remember the first time I made it, years ago, it felt like magic flipping it out of the pan and seeing that sticky, fruit loaded top. I was convinced I’d mess it up, but nope! It worked like a charm, and my kitchen smelled like pure happiness for hours. I bet yours will too!
Why I Keep Making This One
Honestly? Because it’s nearly foolproof, and it looks way more impressive than the effort involved. My kids, well, they go absolutely bonkers for the sticky, sweet strawberry layer on top. (Who wouldn’t, right?). I make this when I need a guaranteed crowd pleaser or just want to use up some berries that are *just* on the edge of being too ripe. Plus, it’s a nice change form the usual apple or pineapple upside down thing. It just feels… summery, even if you make it in April.
Gather Your Stuff (Ingredients!)
Okay, here’s what you’ll need. Don’t stress too much about exact measurements, baking is an art, right? (Mostly… maybe follow these though). Oh, and use room temperature stuff for the cake batter, it really helps it come together nicely.
For the Strawberry Layer:
- About 3 cups (or like, a big punnet) of fresh strawberries, hulled and sliced maybe about 1/4 inch thick? Just not too thin or they’ll turn to mush.
- 1/2 cup (1 stick) unsalted butter
- 3/4 cup packed light brown sugar
- 1 tablespoon cornstarch (this is kinda important, helps keep the juices form getting too runny)
- 1/2 teaspoon vanilla extract (the real stuff if you can swing it!)
For the Cake Batter:
- 1 and 1/2 cups all purpose flour
- 1 and 1/2 teaspoons baking powder
- 1/4 teaspoon salt
- 1/2 cup (1 stick) unsalted butter, softened
- 1 cup granulated sugar
- 2 large eggs, room temperature
- 1 teaspoon vanilla extract
- 1/2 cup milk (whole milk is best, but honestly, whatever you have is probably fine)
I sometimes use frozen strawberries if fresh aren’t great, but you have to thaw them and drain them super well, otherwise it gets watery. Not ideal. And for the butter, I always use unsalted because then I control the saltiness, but if you only have salted, just reduce the added salt in the batter a tiny bit.
Let’s Bake This Thing! (Directions)
Alright, deep breath! It’s easy peasy. Get your oven preheating to 350°F (175°C) first. Important step, don’t skip it!
- Okay, grab a 9-inch round cake pan. You’re gonna wanna butter and flour it really well, or use baking spray with flour. This helps it not stick when you flip it later, trust me.
- Now, for the strawberry layer. Melt the butter right in a small saucepan over medium heat. Once melted, stir in the brown sugar until it’s mostly dissolved and bubbly.
- Take it off the heat and stir in the cornstarch and vanilla. It’ll thicken a bit.
- Pour this sugary butter mixture into the bottom of your prepared cake pan. Spread it out evenly.
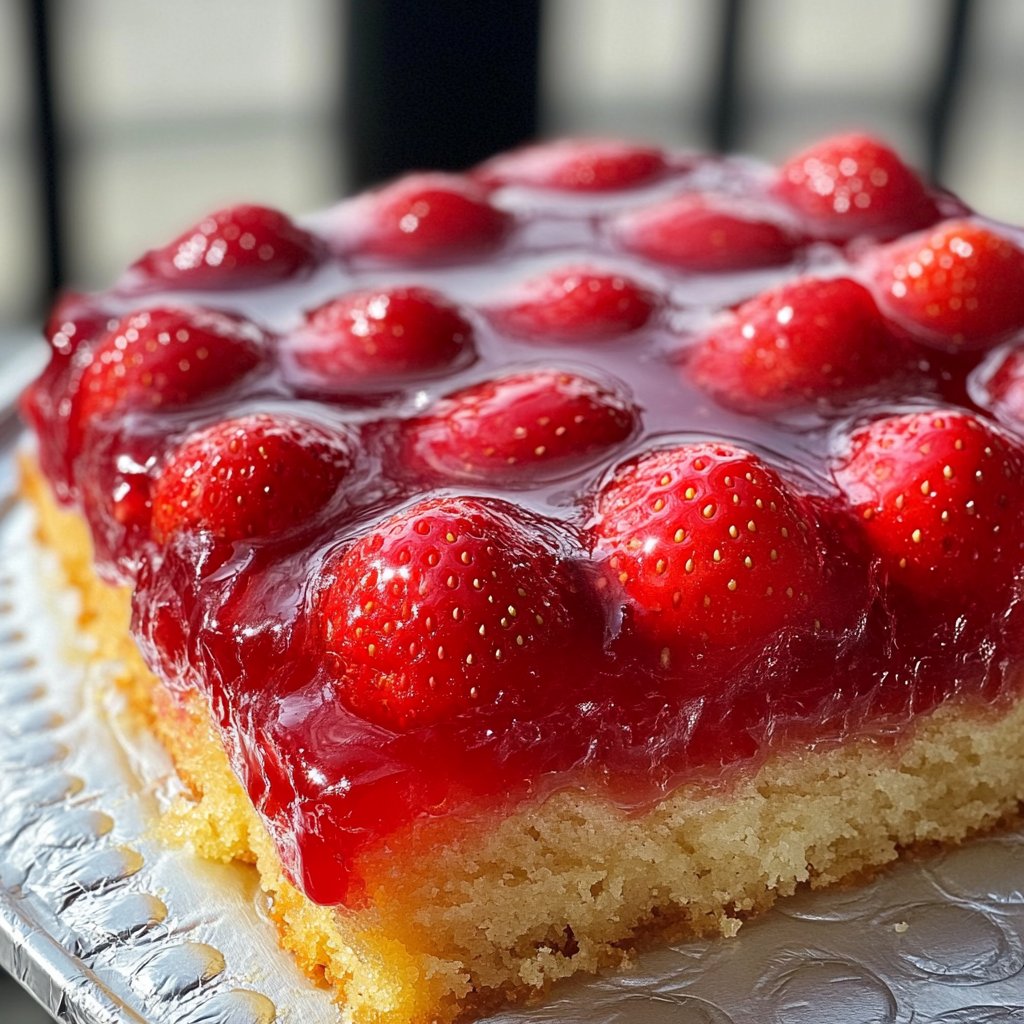
- Here’s the fun part! Arrange your sliced strawberries on top of the sugar mixture. Make pretty patterns, pile them up, whatever floats your boat. Just try to cover the bottom (which will be the top!) nicely. I usually start around the edge and work my way in.
- Set that pan aside while you make the batter.
- In a medium bowl, whisk together the flour, baking powder, and salt. Just a quick whisk to combine.
- In a larger bowl, or the bowl of your stand mixer if you’re fancy (or just lazy like me sometimes!), cream together the softened butter and granulated sugar until it’s light and fluffy. This takes maybe 3-5 minutes. Get some air in there!
- Beat in the eggs one at a time, mixing well after each addition. Scrape down the sides of the bowl. Add the vanilla extract too.
- Now, you’re going to alternate adding the dry ingredients and the milk. Add about a third of the flour mixture, mix on low speed just until *barely* combined. Then add half the milk, mix. Another third of the flour, mix. The rest of the milk, mix. Finish with the last of the flour. DO NOT overmix! Seriously, stop mixing as soon as you don’t see dry streaks of flour anymore. Overmixing makes cakes tough. Blech.
- Carefully dollop the batter over the strawberries in the pan. Spread it gently so you don’t mess up your beautiful strawberry arrangement underneath. Try to cover all the strawberries evenly.
- Pop the pan into your preheated oven. Bake for 40-50 minutes. How do you know it’s done? A wooden skewer or toothpick inserted into the *center* of the cake (not the edge where the strawberries are) should come out clean.
- Okay, the moment of truth! Take the cake out of the oven and let it sit in the pan for just 5-10 minutes. Don’t wait too long! If it cools too much, the sugar mixture will seize up and your cake will be stuck.
- Put a serving plate (one with a lip is good, because there’s sticky syrup!) upside down on top of the cake pan. Holding both the plate and the pan firmly, flip it all over in one quick motion!
- Let the pan sit upside down on the plate for another 5 minutes or so. This lets the topping drip down onto the cake nicely.
- Carefully lift the pan off. Voila! Gorgeous strawberry upside down cake! If a few strawberries stuck to the pan (it happens!), just gently peel them off and put them back in place on the cake. No one will ever know.
- Let it cool a little bit, but honestly, it’s best served warm.
Stuff I’ve Learned (Notes)
So, through trial and error (mostly error, ha!), I’ve figured a few things out. Make sure your butter is really soft for the batter. Like, leave it out on the counter for an hour or so. If you poke it, your finger should leave a dent easily. Also, lining the bottom of the pan with parchment paper *before* you put the butter/sugar mix in can be an extra insurance policy against sticking, although I usually skip it if I butter/flour well.
Oh, and about those 5-10 minutes cooling time before flipping? Don’t skip it, but don’t push it past 10 minutes either. It’s a sweet spot!
Trying New Things (Variations)
I’ve played around a bit with this! You could totally swap out some of the strawberries for rhubarb (so good!), or maybe a mix of berries. I tried it once with just raspberries, but they kind of fell apart and it was a bit too tart for my liking. Stick with strawberries as the main event, I think.
You could also add a pinch of cinnamon or a tiny grate of lemon zest to the strawberry layer mixture for a little extra something something.
Tools That Help (Equipment)
You’ll need a 9 inch round cake pan (important size!). A small saucepan for the topping, and couple of mixing bowls (one medium, one larger). A whisk, rubber spatula, and either a hand mixer or stand mixer for the batter are super helpful, though you could cream the butter and sugar by hand if you have strong arms and patience! A cooling rack is good for when it’s flipped, though just the plate works too. And a wooden skewer is essential for checking if it’s done!
Keeping It Fresh (Storage)
Store any leftovers (ha!) covered at room temperature for a day, or in the fridge for maybe 3-4 days. Gently warming a slice makes it extra gooey and nice. Though honestly, in my house it never lasts more than a day!
How I Like to Serve It (Serving Suggestions)
Warm is best! A scoop of vanilla ice cream melting on top is pure heaven. Or just a dollop of fresh whipped cream. My grandma used to serve it plain with a cup of tea, and there’s something really lovely about that too.
Lessons Learned the Hard Way (Pro Tips)
Okay, listen up. I once tried rushing that cooling step before flipping and the whole glorious topping stayed stuck in the pan. Devastating! So let it cool just that 5-10 minutes. Don’t get greedy.
Also, make sure your baking powder is fresh. If it’s been sitting in the pantry for years, your cake won’t rise properly. You can test it by putting a spoonful in hot water; if it fizzes, it’s good! If not, get new stuff. Baking powder is your friend for a light cake!
Another tip: Measure your flour correctly! Don’t just scoop it straight form the bag with your measuring cup; it packs it in and you end up with too much. Spoon the flour lightly into the cup and then level it off with a straight edge. Makes a difference! For more baking tips check out King Arthur Baking’s site, they are pros.
Burning Questions Answered (FAQ)
Q: Can I use frozen strawberries?
A: Yeah, you can, but like I said above, you HAVE to thaw and drain them really well. Otherwise, you’ll end up with a soggy mess on the bottom. It’s just not as good as fresh.
Q: My cake stuck! What did I do wrong?
A: Most likely, you didn’t butter/flour the pan well enough, or you waited too long to flip it after it came out of the oven. Or maybe didn’t let it sit upside down long enough. Try one of those things next time!
Q: Can I make this in a different size pan?
A: You probably could, but you’d need to adjust the baking time. A smaller pan would be thicker and take longer; a larger pan might be thinner and bake faster. I really only make it in a 9-inch round, it’s perfect!
Q: What about using a different fruit?
A: Totally! Pineapple is classic, obviously. Peaches are great too. Any fruit that gets soft and juicy when baked would probably work, but make sure you still use that cornstarch in the butter layer to help thicken the juices. You could even do apples, though that feels more like a fall thing. Check out Smitten Kitchen’s rhubarb upside down cake for inspiration, she’s brilliant!
Alright, go bake! And let me know how it turns out!